Do you have a photo you wish had a smidge more space at the sides? Perhaps you need to adjust some text, get rid of a photobombed snap, or simply make the shot look less confining. Whatever your reasons are, background extension can adjust these issues.
Photoshop’s actually pretty great at this, offering numerous simple to advanced features to make it happen. In this post, we’ll share how to extend background in Photoshop, quicker alternatives, and some real-life tips for professional results!
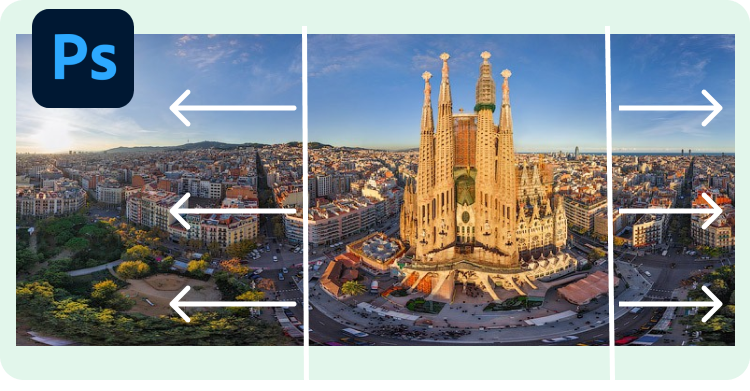
Table of Contents
- Part 1: What Does It Mean to Extend Background in Photoshop?
- Part 2: Simple Ways to Extend Background in Photoshop
- Part 3: Professional Tools to Extend Background in Photoshop
- Part 4: Advanced & AI-Powered Online Methods to Extend Background in Photoshop
- Part 5: Pro Tips for Extending Backgrounds in Photoshop
- Final Words
Part 1: What Does It Mean to Extend Background in Photoshop?
Extending the background with Photoshop gives the image a larger background than the original one. This is usually performed to improve the composition, eradicate distraction, emphasize a product, or make an image fit a specific canvas size.
Part 2: Simple Ways to Extend Background in Photoshop
The following is how to extend background in Photoshop using the Crop tool, solid colors, and the Content-Aware Fill feature:
How to Extend a Background in Photoshop with the Crop Tool
The Crop Tool in Photoshop lets you stretch the canvas’s width for an extended backdrop. It suits solid or plain backgrounds, such as plain colors or gradients. This technique, however, can leave visible seams or uneven spots when dealing with a complicated background. You can lengthen the background with the Crop tool in Photoshop with the following instructions:
- Step 1: Open the pic in Photoshop whose background you wish to lengthen
- Step 2: Pick the Crop Tool from the toolbar. Then, drag the corners or edges of the background to extend the canvas.
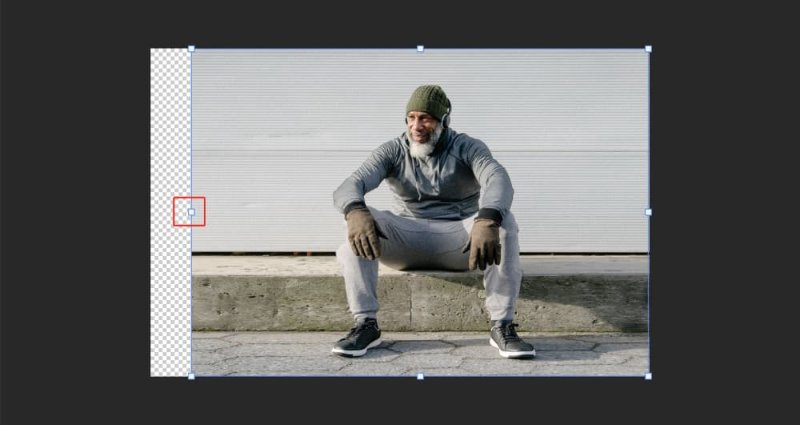
- Step 3: Press and hold the “Shift” to keep the same aspect ratio. Once done, hit “Enter” to apply the changes. The extended area will appear transparent.
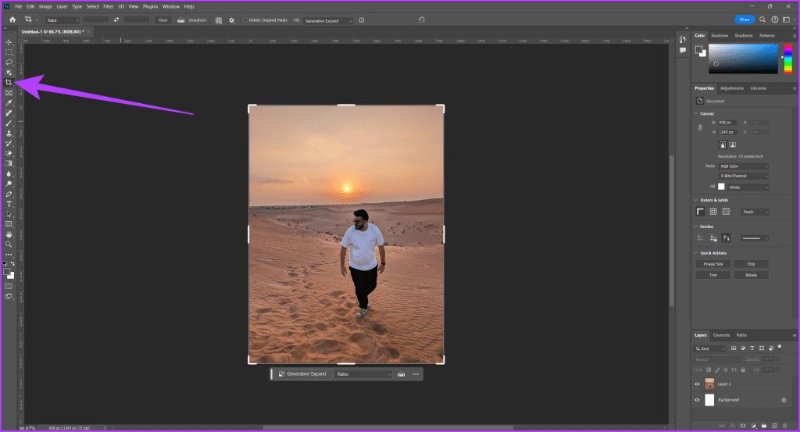
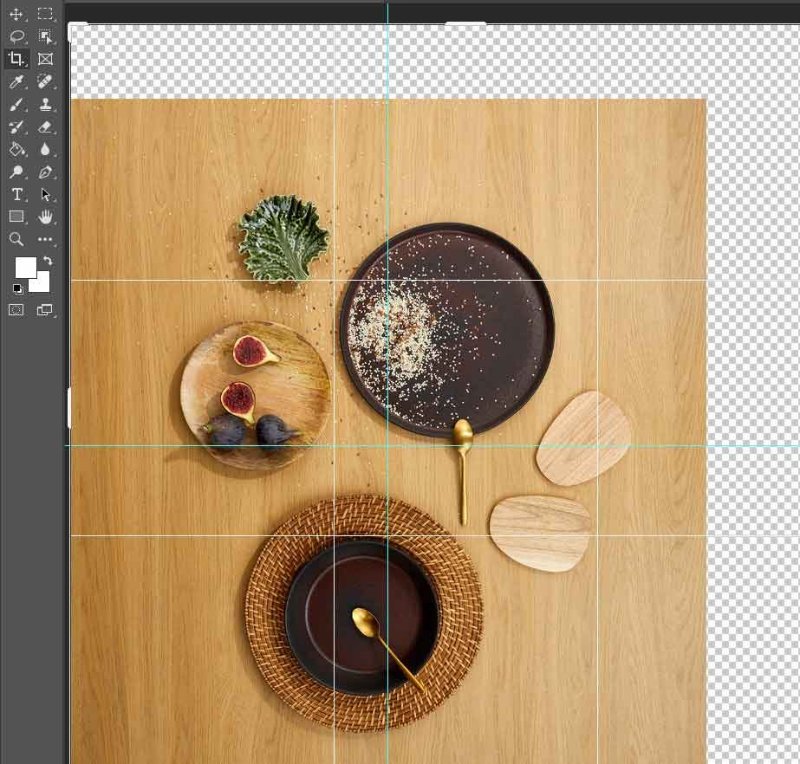
Extending Backgrounds in Photoshop Using Solid Colors
Lengthening a background with a solid color in Photoshop means adding an equal color to enlarge the picture. This straightforward technique suits photos with simple, solid-colored backgrounds. Matching the precise color, however, can be difficult.
The final product may appear flat or artificial without textures, shadows, and light. But for a perfect appearance, you might have to blend the new space manually with the original background. Follow these instructions to lengthen the background in Photoshop by employing solid colors:
- Step 1: Open the pic in Photoshop whose background you wish to lengthen.
- Step 2: Then, head to “Image.” Choose “Mode.” Make sure you’re in RGB or CMYK mode.
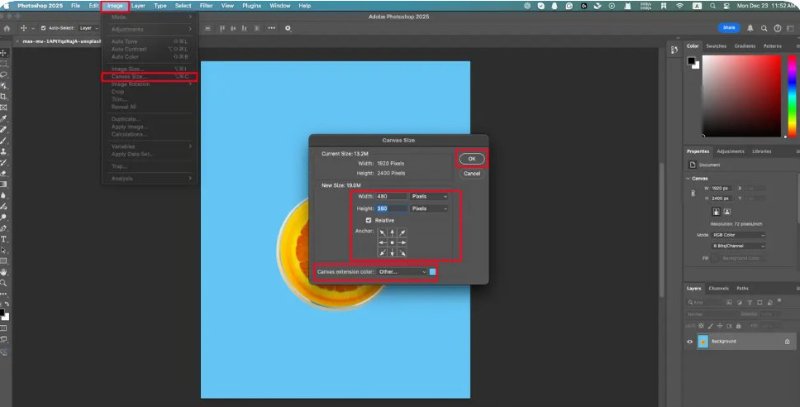
- Step 3: Next, head to “Image” again. Choose “Canvas Size” to make the background larger.
- Step 4: Set the new width and height. Then, use the “Anchor” option to choose where the canvas expands.
- Step 5: Pick a “Canvas Extension Color” that matches your background, or use white. Hit “OK.” If you want advanced options, then learn how to extend background in Photoshop with Content-Aware in the section beneath:

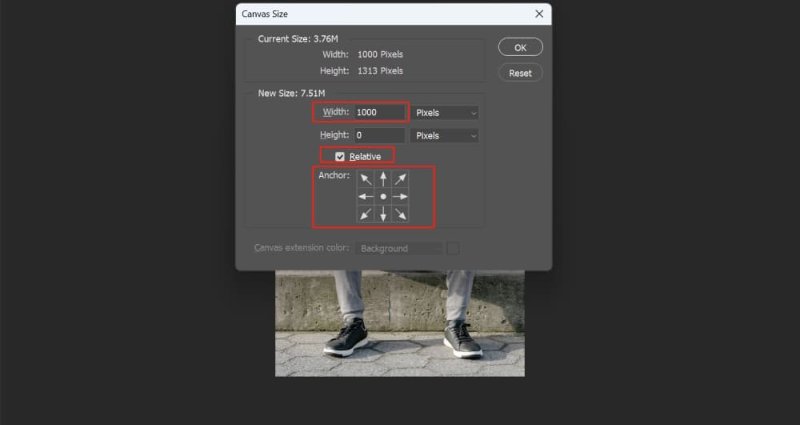
How to Extend the Background in Photoshop with Content-Aware Fill
In Photoshop, there is an advanced feature, Content-Aware Fill. It allows one to expand a background by allowing to create new information that fits the frame. The feature applies well to textured or complicated backgrounds. Therefore, the extensions appear flawless and natural. However, it may have trouble with detailed patterns, strong lighting differences, or distinct objects. This is how to extend background in Photoshop with Content-Aware feature:
- Step 1: Open the pic in Photoshop whose background you wish to lengthen.
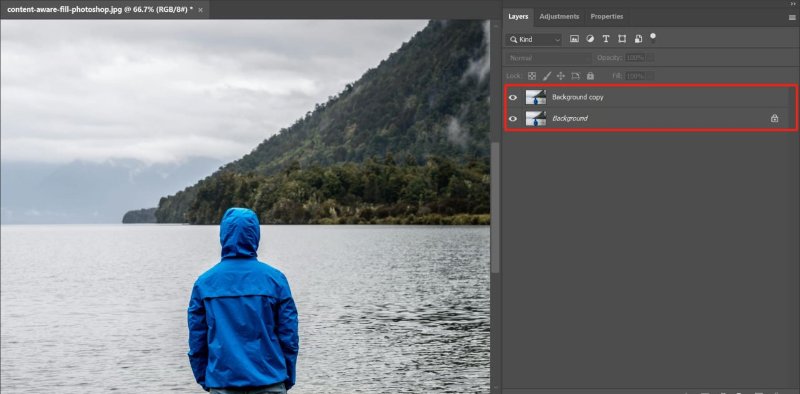
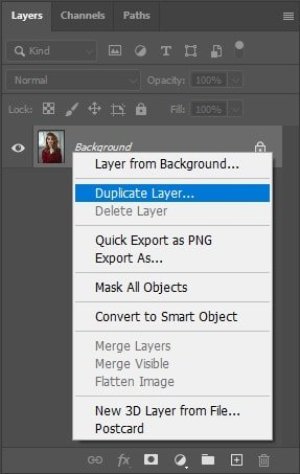
- Step 2: Head to the “Layers” panel. Right-click on the background layer. Then, select “Duplicate Layer.” This will create another layer of the pic to preserve the original one.
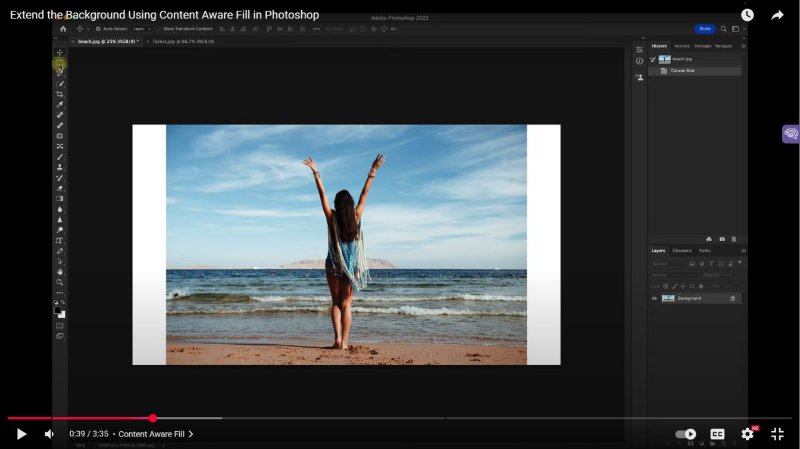
- Step 3: Head to “Image.” Then, choose “Canvas Size.” Increase the canvas dimensions as needed.
- Step 4: Use a selection tool like the “Rectangular Marquee” or “Lasso Tool.” Select the empty area you want to fill. Right-click on the empty space. Choose “Fill.”
- Step 5: Head to “Edit.” Next, choose “Content-Aware Fill” to open the workspace and preview the fill.
- Step 6: Adjust the sampling area or tweak “Color/Rotation Adaptation” for better results.
- Step 7: Hit “OK” to apply the fill. Refine the result if needed.


Part 3: Professional Tools to Extend Background in Photoshop
If you require more customization options for lengthening the background in Photoshop, employ the Marquee, Clone Stamp, and Healing Brush tools:
How to Extend Background in Photoshop Using the Marquee Tool
Photoshop has a tool known as Marquee, in which you can make an extension of a background. You’ll need to pick a section of an already existing background and stretch it to include the newly created area. This technique suits plain backgrounds and spaces.
Particularly with complex or patterned backgrounds, stretching can nonetheless alter visible seams or put defects in perspective. Using the Photoshop Marquee tool, proceed as indicated below to stretch the backdrop:
- Step 1: Open the pic in Photoshop whose background you wish to lengthen.
- Step 2: Head to the “Layers” panel. Right-click on the background layer. Then, select “Duplicate Layer.” This will create another layer of the pic to preserve the original one.
- Step 3: Pick the “Rectangular Marquee Tool” from the toolbar. Next, drag to select a part of the background you want to lengthen.
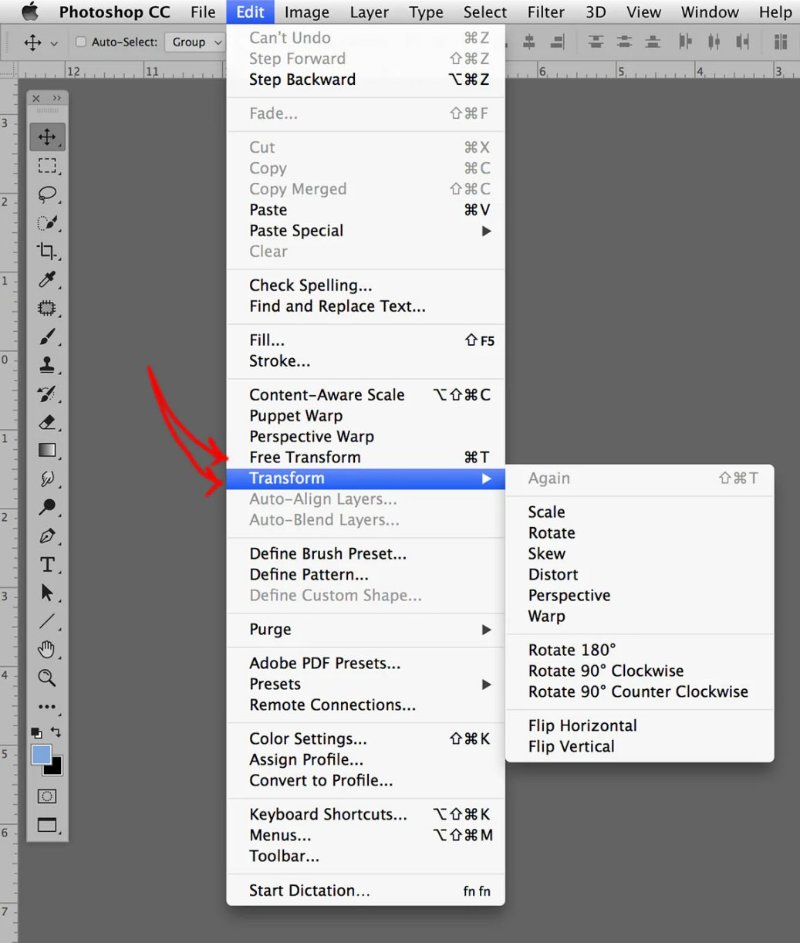
- Step 4: Head to “Edit.” Then, choose “Free Transform” to activate the transform handles.
- Step 5: Drag a side handle to stretch the background and fill the new space. Hit “Enter.” This will apply the transformation.
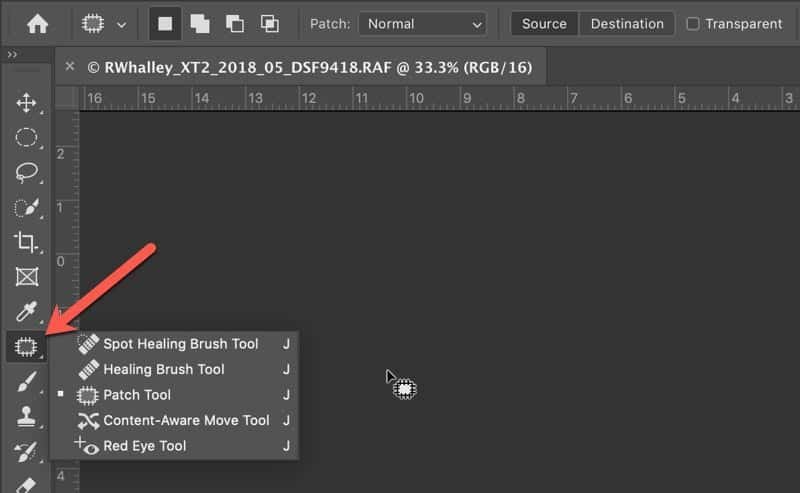
- Step 6: Deselect the area (Ctrl+D or Cmd+D). Use the “Clone Stamp,” “Healing Brush,” or “Patch Tool” to smooth out any seams.

Extend Background in Photoshop with the Clone Stamp and Healing Brush Tools
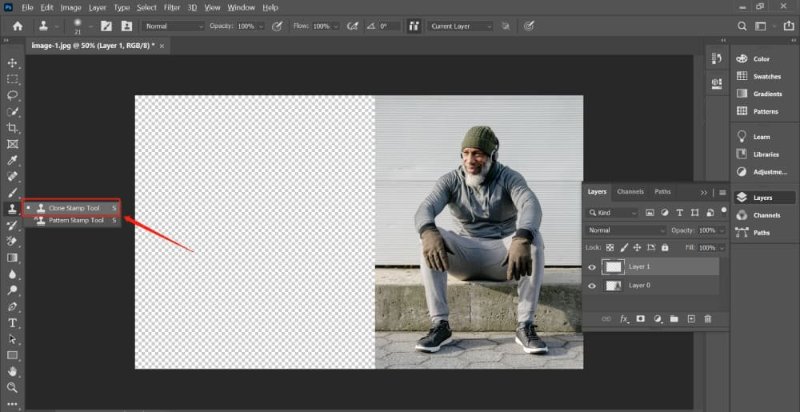
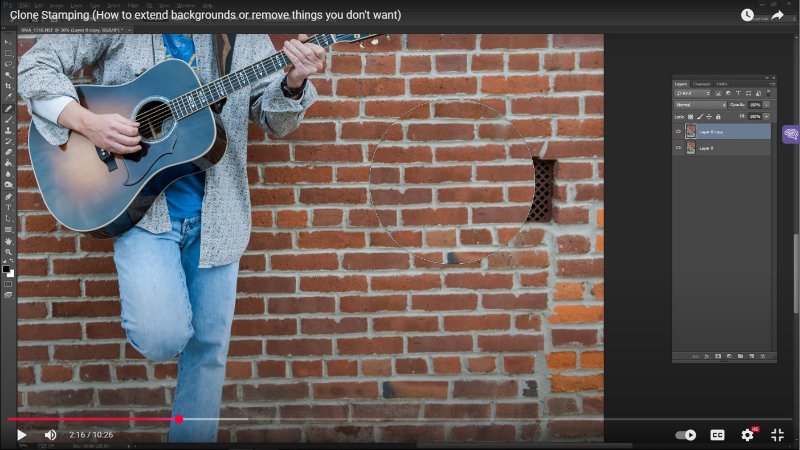
If you want to know how to extend background in Photoshop without Content-Aware, there are other manual tools as well. The Clone Stamp and Healing Brush tools give you an opportunity to copy and paste parts of the background to extend an image manually. The Clone Stamp is used to directly copy the pixels. Whereas the Healing Brush is used to mix the copied part with the rest of the colors and textures to make it look smoother. Nonetheless, both tools may take time, and it takes art to prevent the appearance of patterns, dissimilar lighting, or seams. The Clone Stamp can be used on edges, and the Healing Brush on open spaces. Here’s how to use both tools for extending background:
- Step 1: Open the image in Photoshop whose background you wish to extend.
- Step 2: Head to “Image.” Then, choose “Canvas Size” to add more space.
- Step 3: Next, create another layer to preserve the original one. Head to the “Layers” panel. Right-click on the background layer. Then, select “Duplicate Layer.”
- Step 4: Select the “Clone Stamp Tool” (S shortcut). Press and hold “Alt” (Windows) or “Option” (Mac). Keep holding and click on the source area you want to copy.
- Step 5: Paint over the empty area to clone the background. Adjust brush size, hardness, and opacity for smooth blending ([ ] keys to resize the brush).
- Step 6: Pick the “Healing Brush Tool.” Press and hold “Alt” (Windows) or “Option” (Mac). Keep holding and click on a new source point near the cloned area.
- Step 7: Then, move the brush to paint over seams or rough spots to blend them naturally. Repeat cloning and healing until the background looks seamless.


Part 4: Advanced & AI-Powered Online Methods to Extend Background in Photoshop
If you want to learn how to extend background in Photoshop without Content-Aware or other manual tools, there are some AI-powered options as well. They can automatically extend the background in a few clicks. Here’s how to extend background in Photoshop with AI for free:
How to Use AI in Photoshop to Extend Background (Generative Expand)
Using artificial intelligence, Photoshop’s Generative Expand automatically enlarges an image’s canvas. It fills newly generated regions with realistic material that complements the original. Resizing photos or producing panoramas is especially well-suited to this feature. While Generative Fill lets you select or describe areas for the AI to generate matching content.
However, results may vary, as fine details, lighting, and perspective can be complex to match perfectly. The generated content may also have lower quality or resolution, require manual touch-ups, and depend on Adobe’s servers and credit limits for processing. Here’s how to extend background in Photoshop using Generative Fill and Expand:
Using Generative Expand:
Here’s how to extend background in Photoshop AI for free with Generative Expand:
- Step 1: Open the image in Photoshop whose background you wish to extend. Then, select the “Crop Tool” (C key) to extend the canvas and create space.
- Step 2: Choose “Generative Expand” from the toolbar or the Contextual Task Bar. Next, drag the image edges or corners to expand the canvas.
- Step 3: Click “Generate.” This will allow Photoshop to fill the new space. Add a prompt if you want specific content, or leave it blank to match the existing background.
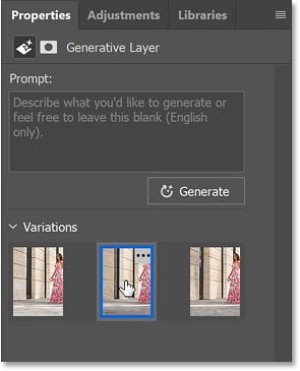
- Step 4: Open the “Properties” panel. View and compare the generated variations. Pick the version you like best.
Using Generative Fill:
Here’s how to extend background in Photoshop using Generative Fill:
- Step 1: Open the image in Photoshop whose background you wish to extend. Then, select the “Crop Tool” (C key) to extend the canvas and create space.
- Step 2: Select the transparent area with the “Rectangular Marquee Tool.” Next, click “Generative Fill” in the Contextual Task Bar.
- Step 3: Leave the prompt blank. Then, tap “Generate” to fill the space naturally. Choose the variation you like best. You can also choose “Generate” again for new options.

Using Fotor or Canva to Extend Background Online
If you want to use an online tool rather than Photoshop to extend the background, Fotor and Canva are good options. Fotor’s AI Image Extender uses outpainting technology to analyze an image and expand its background with realistic details. It can also perform inpainting to fix or fill parts within an image. However, it may have trouble with complex backgrounds and doesn’t allow custom size adjustments.
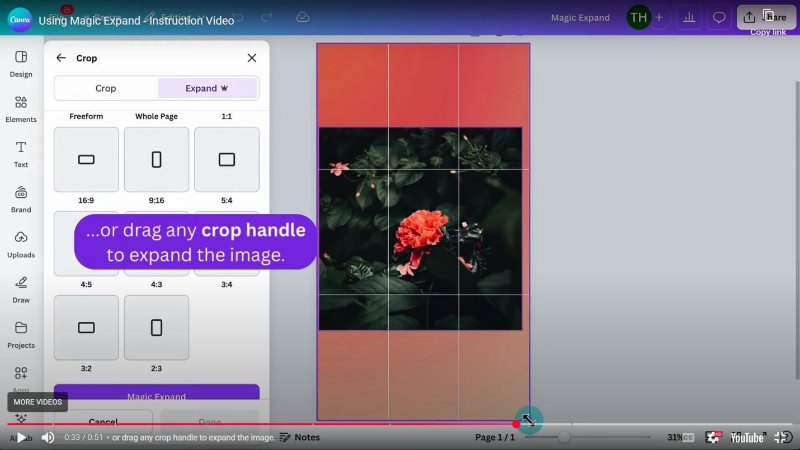
Canva’s Magic Expand tool, available with Canva Pro, also uses AI to extend images and add space for better framing or text placement. It functions well for simple edits but may have issues with faces, hands, or detailed scenes, sometimes producing visible seams or uneven blending. Follow the instructions beneath to employ Fotor and Canva to extend the background:
Using Fotor:
Here’s how to use Fotor’s AI Extender to extend the background:
- Step 1: Create a free Fotor account. Then, log in. Head to “AI Tools.” Then, choose “AI Extender (Beta).”
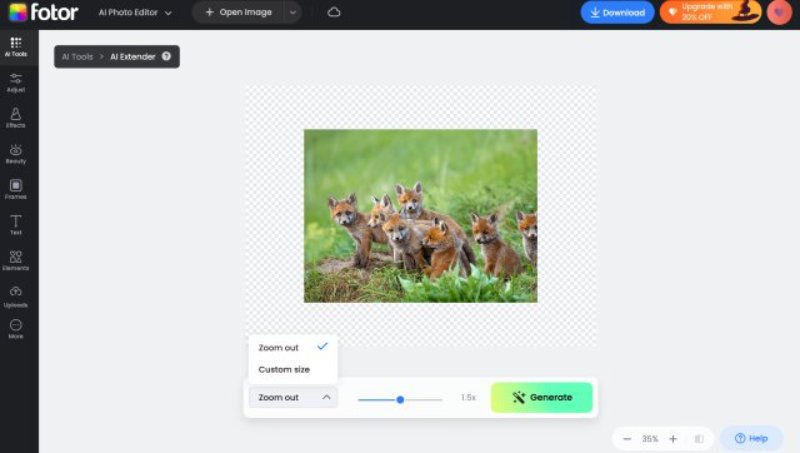
- Step 2: Upload your image. Adjust the extension size using “Zoom Out” or “Custom Size.”
- Step 3: Click “Generate” to create three extended versions (generate more if needed).
- Step 4: Choose your favorite. Tap “Apply.” Then “Download” to save it.
Using Canva:
Here’s how to use Canva’s Magic Expand to extend the background:
- Step 1: Open an image in Canva whose background you wish to extend. Select the image and click “Edit.”
- Step 2: In the left panel, choose “Magic Expand” beneath “Magic Studio.” Next, pick a preset size or drag the crop handles to expand the image.
- Step 3: Click “Magic Expand.” Then, review the preset size or aspect ratio options. Choose your desired one.
- Step 4; You can also drag the crop handles to the image to lengthen its backdrop. Hit “Magic Expand” again to generate results.

PixPretty Image Editor – Free Online Tool to Extend and Edit Backgrounds
If you want more customization options for free while extending the background, try Tenorshare PixPretty. It has an AI-empowered capability to extend, edit, and delete the background within a couple of clicks without the need to tinker with it manually. Background colors can also be changed or erased, images can be resized, compressed, or converted, watermarks removed, and pics can be batch edited.
PixPretty is trained on millions of real-world images. It can extend complex backgrounds within a few seconds, which is useful with products, people, cars, animals, and graphics. The other features it offers include AI retouching portrait, shadow effects, and converting the picture format (WeBP to PNG or JPG to PNG).
Part 5: Pro Tips for Extending Backgrounds in Photoshop
For professional results while extending the background in Photoshop, here are some tips you can follow:
- Use high-resolution images to keep good quality when extending backgrounds.
- Work on a duplicate layer to protect the original image.
- For Content-Aware Fill, adjust settings and sampling areas for better results. Try the Extend option for custom fills.
- Using Content-Aware Scale, secure the crucial subjects in addition to experimenting with both horizontal and vertical scaling to get natural outcomes.
- The use of the Clone Stamp Tool requires the correct brush size, the level of opaqueness, and the source area, which should correspond with the background.
- Blend colors, lights, and shading.
- Use tools such as Content-Aware Fill, Clone Stamp, and hand edits together for the best job.
- Refine edges to smooth out transitions.
- Employ Smart Objects before performing resizing for quality preservation.
- There is a risk of over-stretching of the background in order which can result in distortion.
- Try Generative Fill with different prompts for creative results.
- Keep practicing to get more natural and professional outcomes. Start Remove for Free
Final Words
Improving image composition, balancing, and size requires studying how to extend background in Photoshop. To make smooth, natural-looking extensions, you can use Crop Tool, Content-Aware Fill, or Generative Fill.
However, Photoshop can eat up time and takes practice to learn. Whereas other tools like Canva and Fotor offer paid features. For a quicker and free option, Tenorshare PixPretty is an excellent AI-powered tool that automatically extends and edits backgrounds in seconds.


