Table of Contents
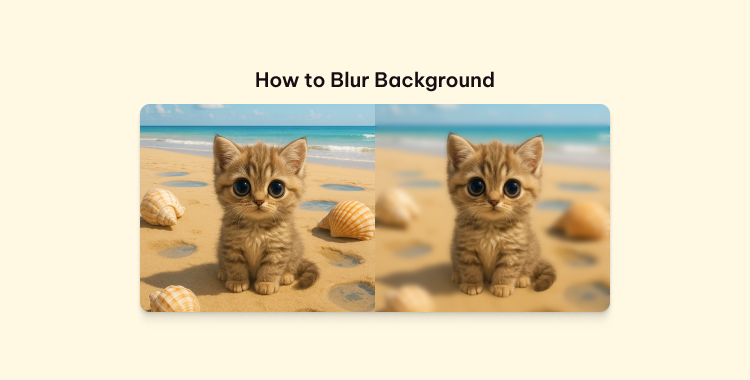
Blurring the background on an iPhone can make photos look clean, professional, and focused on the subject. It removes messy or distracting details and gives a soft, stylish effect. With your iPhone's built-in features, you can do this quickly, no extra apps needed.
In this guide, you'll find 4 simple ways of how to blur background on iPhone photos and videos. From using Portrait mode to quick editing options, these tricks will help you capture stunning shots with ease.
Part 1. How to Blur Background Online?
If you're searching for how to blur background on iPhone without portrait mode, Pixpretty is the perfect online tool. It uses AI-powered technology to detect the subject instantly and apply a smooth, natural blur effect to the background. You don't need professional editing skills—just upload your photo and let Pixpretty handle the rest.
Steps to Blur Background Online with Pixpretty:
- 1. Open Pixpretty Blur Tool in your browser.
- 2. Upload the photo you want to edit.
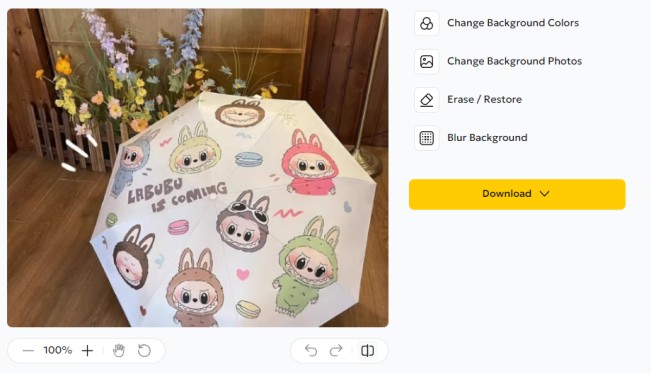
- 3. Let AI detect and blur the background automatically.
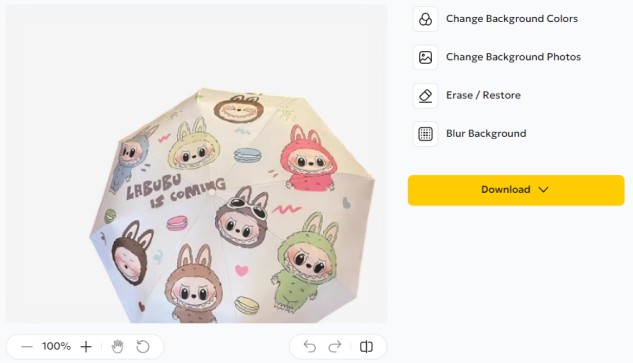
- 4. Adjust blur intensity if needed, then download your edited photo.
With Pixpretty, you can easily blur background online and create stunning photos even if your iPhone doesn't support portrait mode.
Part 2. How to Blur Background on iPhone Camera -- Use Portrait Mode
Blurring the background on iPhone camera shots is simple with Portrait mode. This feature uses special software to focus on your subject while softly blurring the background, creating a professional bokeh effect. It's available on iPhone 7 Plus and newer, including iPhone SE (2nd generation) and later models. On iPhone XR and SE (2nd generation), Portrait mode works when the rear camera detects a face.
How to use Portrait Mode to blur background on iPhone:
- 1. Open the Camera app and select Portrait mode.
- 2. Position your subject and follow the on-screen depth guidance.
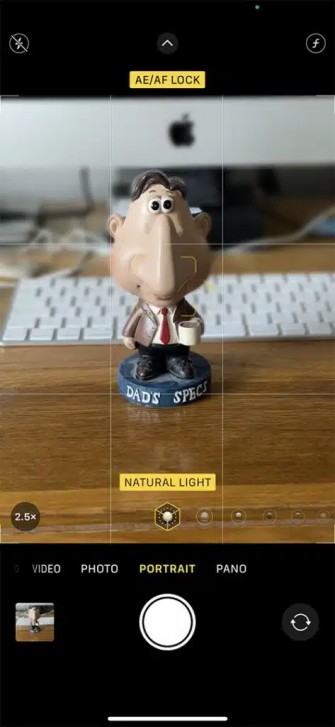
- 3. Tap to focus and press the shutter button.
Tips for better background blur:
- Use good lighting.
- Keep a proper distance from your subject.
- Try different Portrait Lighting effects for a unique look.
If there's not enough light, your iPhone will notify you. This method is also great if you want to blur background on iPhone photo after taking a photo—just open the picture in the Photos app and adjust the blur level.
Part 3. How to Blur Background on iPhone Without Portrait Mode
Even if your iPhone doesn't have Portrait mode, you can still get that soft, dreamy background blur. Whether you're editing an old photo or using an older model, there are easy ways to blur background on iPhone photo and make your subject stand out.
Method 1: Use Editing Apps for Manual Blur
Snapseed (Free)
Snapseed is a free photo editor from Google that gives you precise control over your edits.
- 1. Open the Snapseed app and tap anywhere to load a photo from your gallery.
- 2. Go to Tools → Lens Blur.
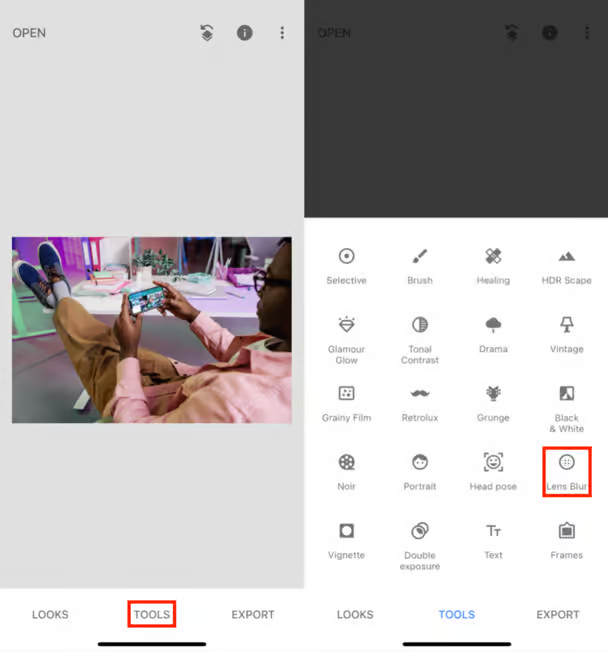
- 3. Pinch or zoom to adjust the blur mask so it only covers the background.
- 4. Swipe up or down to choose Transition, then swipe left or right to control how smoothly the blur fades.
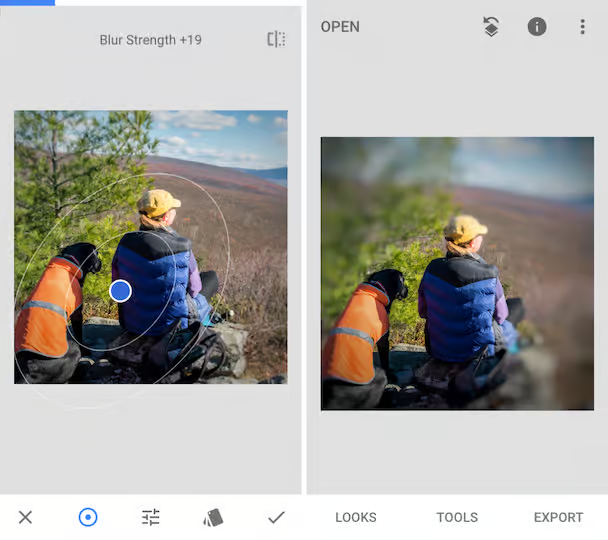
- 5. You can also add a vignette effect to make the subject pop.
- 6. Save your photo once you're happy with the look.
Focos (Free with optional Pro features)
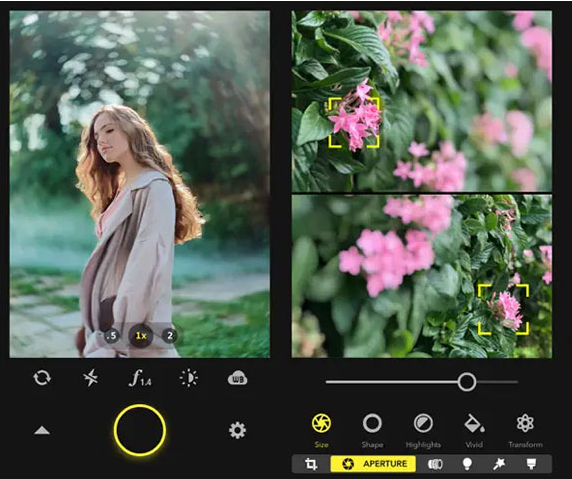
Focos uses AI to add realistic bokeh even if the original photo wasn't taken in Portrait mode. You can:
- Change the blur intensity.
- Simulate professional camera lenses.
- Adjust the focus point after the shot. This makes it perfect for breathing new life into older photos.
Method 2: Remove Background, Then Add Blur
Apps like Picsart and Canva let you cut out your subject and replace the background with a blurred version. This method is great for images with a busy or unattractive background.
Picsart Steps:
- 1. Download and open Picsart.
- 2. Tap the + icon to import your photo.
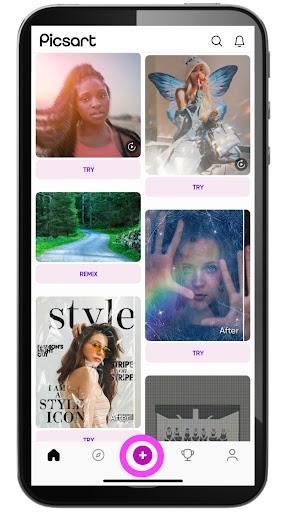
- 3. Go to Effects → Blur.
- 4. Choose from effects like Motion Blur, Radial Blur, Tilt-Shift, or Bokeh.
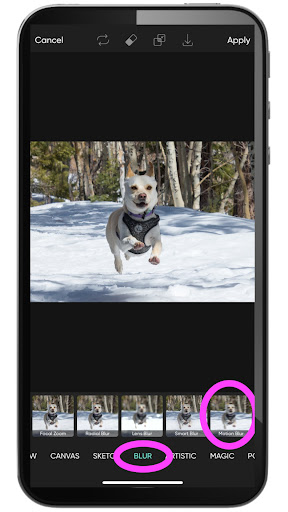
- 5. Adjust the blur intensity and position to keep your subject sharp.
- 6. Save and share your edited photo.
Part 4. How to Blur Background on iPhone After Taking Photo
It's common to take a great shot only to notice a busy or distracting background later. Fortunately, you can still blur background on iPhone camera after the photo has been captured. The steps depend on whether the photo was taken in Portrait mode or in standard photo mode.
If the Photo Was Taken in Portrait Mode
Portrait mode photos store depth information, which allows you to change the blur level any time without losing image quality.
Steps to adjust blur in Portrait photos:
- 1. Open the Photos app on your iPhone and select the Portrait photo you want to edit.
- 2. Tap Edit in the top-right corner of the screen.
- 3. Look for the "f" icon (aperture symbol) at the top—this controls the depth of field.
- 4. Drag the depth control slider:
Left (lower f-number) = stronger, more pronounced blur.
Right (higher f-number) = softer, less noticeable blur.
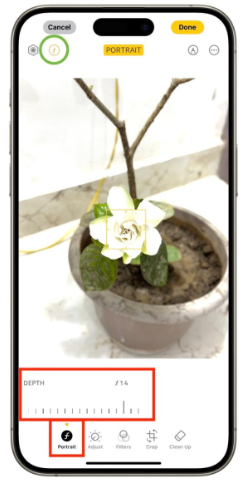
- 5. Preview the result as you adjust, and when satisfied, tap Done to save.
If the Photo Was Not Taken in Portrait Mode
Standard photos don't have depth data, so you'll need to use an editing app that can simulate the blur effect. Let's see how to blur background on iPhone without portrait mode:
1. Snapseed (Free)
- 1. Open Snapseed and tap anywhere on the home screen to import your photo.
- 2. Go to Tools → Lens Blur.
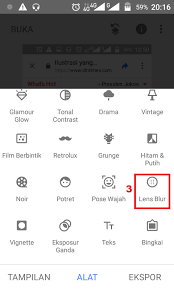
- 3. Pinch and drag to adjust the blur mask so your subject stays sharp.
- 4. Swipe up or down to select Blur Strength or Transition, then swipe left or right to fine-tune.
- 5. Apply a slight vignette for extra focus on the subject, then save your photo.
2. Focos (Free with optional Pro features)
- 1. Import your image into the Focos app.
- 2. Use the AI-powered focus tool to select the main subject.
- 3. Adjust the blur intensity slider to create the desired background blur.
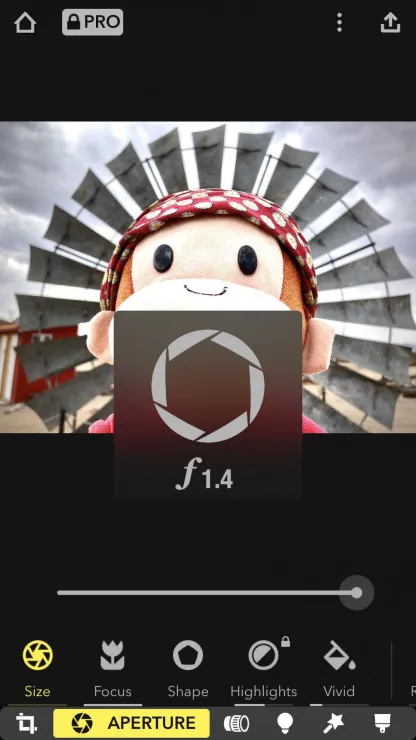
- 4. Optionally, change the aperture style to produce different bokeh shapes for a professional camera look.
3. Photoshop Express (Free with Pro options)
- 1. Open Photoshop Express and import your photo.
- 2. Tap the Blur tool and choose from Full Blur, Radial Blur, or Selective Blur.
- 3. Use the masking brush to precisely select which areas remain in focus and which areas blur out.
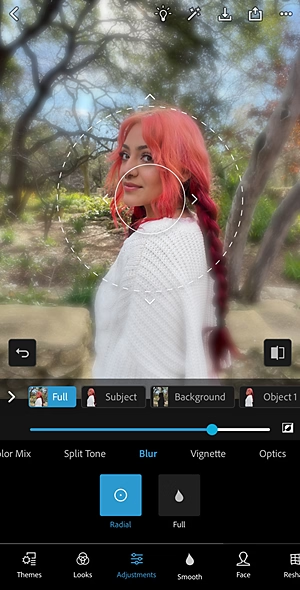
- 4. Adjust intensity until the effect looks natural.
Part 5. How to Blur Background on iPhone Video
Blurring the background in your videos can make your subject stand out and give your footage a professional look. On iPhones, you can do this in two main ways:
For iPhone 13 and Newer -- Use Cinematic Mode
Cinematic Mode is built into the Camera app on iPhone 13 and later models. It automatically adds a beautiful background blur while keeping your subject in focus.
How to blur background on iPhone video:
- 1. Open the Camera app → Swipe to Cinematic.
- 2. Record your video while keeping your subject in focus.
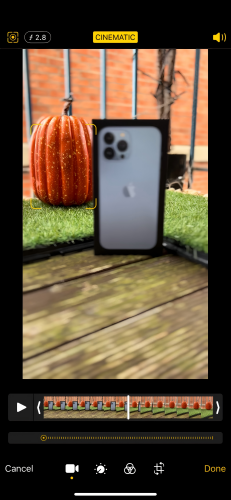
- 3. Open the recorded video in the Photos app → Tap Edit → Adjust the focus point or blur strength.
For Older iPhones or Non-Cinematic Videos
If your iPhone doesn't support Cinematic Mode, you can use video editing apps to add background blur.
1. VN Video Editor (Free)
- Import your video.
- Apply a blur overlay effect.
- Adjust the intensity to your liking.
2. CapCut -- Background Blur Filter
CapCut is a free, beginner-friendly app with multiple blur styles.
How to blur out background on iPhone in CapCut:
- 1. Open CapCut, tap New Project, and select your video from local storage, CapCut Cloud, or stock footage.
- 2. Go to Canvas → Blur. Choose from four blur styles and tap the checkmark to apply. You can resize or reposition the video for the perfect blur. Use other editing tools to enhance your video.
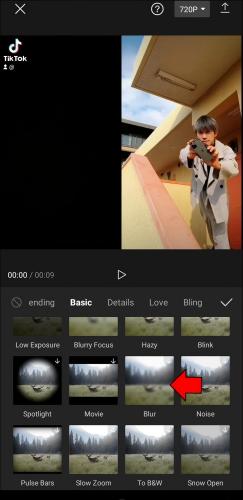
- 3. Tap Export to save the video to your iPhone or share directly to platforms like TikTok or Instagram.
FAQs About Blur Background on iPhone
Q1. Can I blur background on iPhone SE?
Yes, but not with Cinematic Mode since it's not available on iPhone SE. You can use free apps like CapCut or VN to add blur effects.
Q2. Which iPhones support Cinematic Mode?
Cinematic Mode works on iPhone 13 and newer models, including iPhone 14, 15, and their Pro versions.
Q3. What's the best free app to blur background?
CapCut is one of the best free apps for background blur. It's easy to use, offers different blur styles, and works on any iPhone.
Comparison Table: How to Blur Background on iPhone
| Method | Requires Portrait Mode? | Device Requirement | Tool or App | Difficulty | Best Use Case |
| Using iPhone Camera | ✅ Yes | iPhone 7 Plus or newer | iPhone Camera (Portrait) | Easy | Taking photos with real-time background blur |
| After Taking Photo | ⭕ Optional | All iPhones | Snapseed, Focos | Simple | Editing existing photos to add background blur |
| Without Portrait Mode | ❌ No | All iPhones | Snapseed, Focos, Canva | Medium | For older devices or non-Portrait images |
| Video Background Blur | ✅/❌ Yes (Cinematic) or No | iPhone 13+ or any with app | Cinematic Mode, CapCut, VN | Medium | Blurring background in iPhone videos |
Conclusion
You capture a perfect moment, but the messy background steals the spotlight. With the right tricks, you can transform it into a soft, artistic blur that instantly makes your subject pop. Learning how to blur background on iPhone isn't just about hiding distractions—it's about giving your photos a professional, cinematic touch straight from your pocket.
Whether using Portrait mode, Cinematic mode, or powerful editing apps, you can turn everyday shots into gallery-worthy images in seconds.


