Let’s be real. No matter how great a raw image turns out, it becomes ten times better after color grading. Color grading adds a level of depth and emotion into your photography that you wouldn’t be able to capture naturally. Photoshop gives you exactly the tools to bring your vision to life.
In this tutorial, you’ll learn exactly how to use Photoshop or Lightroom to color grade your photos to match the aesthetic you’re going for. You’ll also get to learn about different tools like Curves, Color Balance, LUTs, and Gradient Maps. Finally, we’ll answer some of your most common questions.
Part 1. Can You Color Grade Photos in Photoshop?
Yes! Photoshop is one of the best platforms for color grading photos. We have no doubt that Lightroom is great for batch editing and fast workflows. However, Photoshop gives you precision like no other. You also get to control individual image elements like never before.
You can enjoy tonal adjustments or even cinematic effects. Photoshop’s editing tools like adjustment layers and masks lets you create mood, balance colors, and build an actual story through your photos.
Part 2. How to Color Grade Photos and Make Them Pop in Photoshop
You can see below a total step-by-step Photoshop color grading tutorial. This tutorial is great for beginners and probably even intermediates who want to make their photos pop.
Step 1: Open Your Image in Photoshop
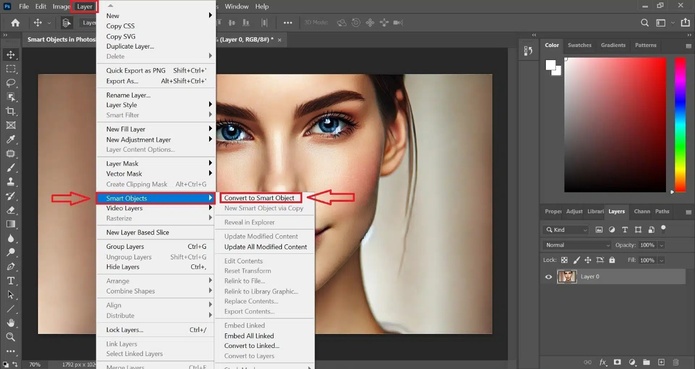
The first step is to open your RAW or JPG file in Photoshop. We recommend that you always work with a duplicate layer or convert your background to a Smart Object to keep edits non-destructive.
Step 2: Apply Basic Adjustments
Before grading, you have to do your regular edit like exposure, contrast, and white balance. You can even use the Camera Raw Filter or add adjustment layers like:
- Brightness/Contrast
- Levels
- Exposure
This makes sure that your image is balanced before the creative edits begin.
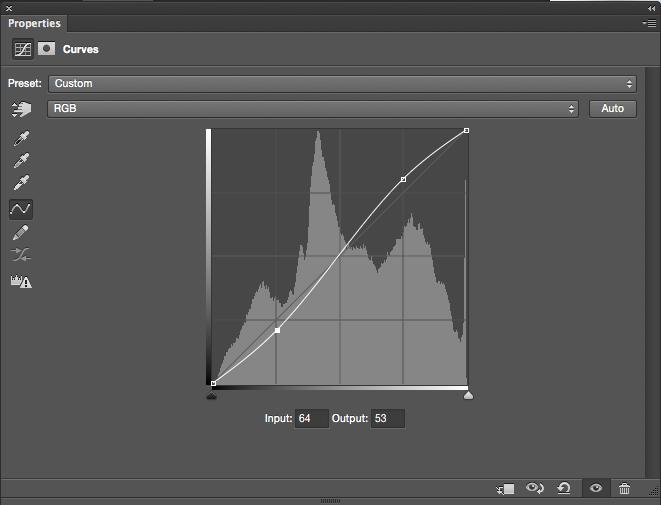
Step 3: Use Curves for Tonal Control
Curves let you control shadows, midtones, and highlights with so much accuracy.
- Add a Curves Adjustment Layer
- Create a subtle “S” curve to increase contrast
- Use RGB channels individually to stylize colors
Step 4: Tweak Colors Using Color Balance
Color Balance lets you to shift tones toward warm or cool. You can do this in highlights, midtones, and even shadows.
- First add a Color Balance Adjustment Layer
- Then adjust sliders for reds, greens, and blues
- Try adding teal to shadows and orange to highlights to make it pop
Step 5: Add a Gradient Map for Mood
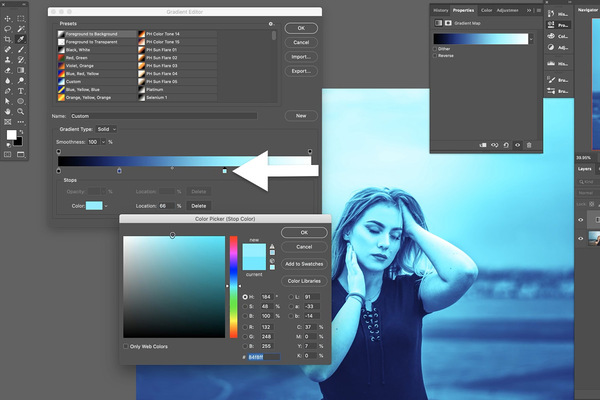
Gradient Maps lets you apply two or more colors across your tonal range.
- Go to Layer > New Adjustment Layer > Gradient Map
- Choose a cute gradient like purple-orange or blue-beige
- Reduce opacity to 20–30% or change blend mode to Soft Light or Overlay
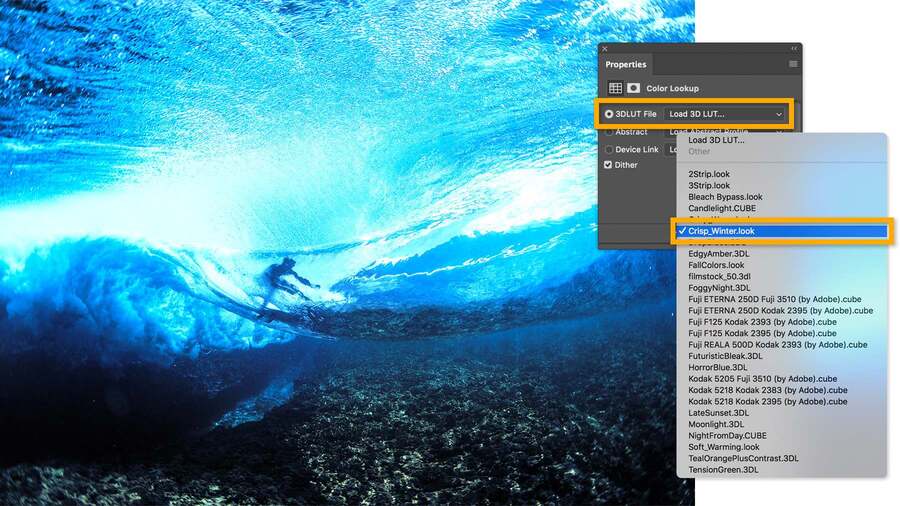
Step 6: Apply Look-Up Tables
Look-Up Tables are actually pre-made color grading presets.
- Add a Color Lookup Adjustment Layer
- Choose from default LUTs like “Crisp_Warm” or load your own .CUBE files
- Adjust opacity to refine intensity
Step 7: Masking for Targeted Grading
Want the background moody but the subject vibrant?
- Use layer masks to apply effects selectively
- Use a soft brush and paint on the mask with black and white
- Great for portraits, product photography, or majestic landscapes
Step 8: Final Polish
Add finishing touches like:
- Vignette using Lens Correction or radial gradient
- Sharpening via High Pass filter
- Noise Reduction via Camera Raw
You can then save your project as a PSD file and export it in the regular JPG or PNG formats.
Part 3. How to Color Grade Photos in Lightroom
We definitely don’t doubt that Photoshop is super advanced. However, it is important to note that Lightroom is easier for a quicker color grading when you’re editing multiple photos.
Quick Guide:
- Import photo into Lightroom
- Use Basic Panel to adjust exposure, contrast, white balance
- Use Tone Curve and HSL sliders for fine color control
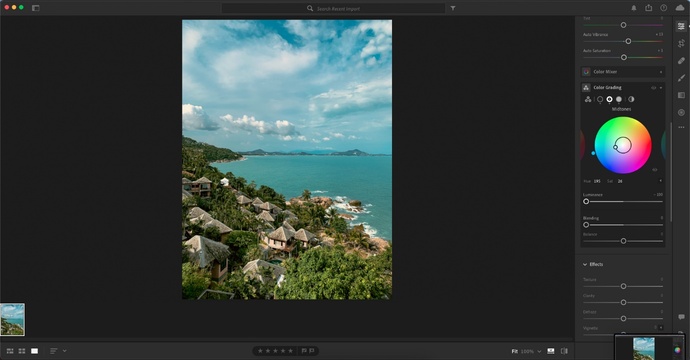
- Add Split Toning via the new Color Grading Panel
- Sync settings across other images
- Export to web or print
FAQs about How to Color Grade Photos in Photoshop
Q1. Is it better to color grade in Lightroom or Photoshop?
We believe that Photoshop is literally the best for targeted and creative grading. However, Lightroom is the best if you’re looking for speed and consistency across large photo sets.
Q2. Should I color grade or edit first?
It is always best to do basic editing first like fix exposure, white balance, and cropping. Once you’re done with these, you can go ahead and color grade your photos exactly how you wanted.
Q3. What software is best for color grading?
- We recommend that photographers use Photoshop & Lightroom.
- DaVinci Resolve is the best in the industry for those who want to use videos.
- Luminar Neo is great for beginners as it offers AI tools for the easiest results.
Q4. Is there an AI for color grading?
There are a handful of AI tools that we recommend for color grading such as Adobe Sensei, Luminar AI, and Capture One Pro. We love how you can use them and still manually fine tune where needed.
Conclusion
Color grading is no longer just for your bigshot filmmakers. The tools inside Photoshop can help anyone make their photos pop with depth and emotion. You can do everything like working on a travel documentary, a portrait that shows all your emotions, or even a social media post for your brand. It’s insane how knowing how to color grade opens a whole new level of creative control.
Related Articles:


