


Setting up your own AI assistant sounds complicated, but it's easier than you think. This guide will walk you through the full moltbot/openclaw download and install process in simple steps. OpenClaw, earlier called Moltbot or Clawdbot, lets you run an AI assistant on your computer and connect it to apps like Telegram or WhatsApp.
Once installed, it can chat, search the web, and even perform tasks on your system. Follow along, and you'll have your personal AI assistant running smoothly in no time.

Table of Contents
Part 1: What is OpenClaw?
OpenClaw is a smart AI assistant that runs on your own computer instead of a website. It was previously known as Moltbot or Clawdbot. Unlike normal chatbots, OpenClaw does more than just reply with text. It can search the web, create files, and help manage information.
After the openclaw install, you can connect it to apps like Telegram or WhatsApp. This means you can chat with your AI assistant from your phone anytime. Many users even control it through messaging apps on OpenClaw Android devices, turning their phone into a remote control for their personal AI agent.
Part 2: What You Need Before Installing OpenClaw
Because OpenClaw has deep system access, the "shopping list" is more about security and stability than just software.
1. Dedicated Hardware (The "Always-On" Machine)
OpenClaw needs to be online 24/7 to be useful.
-
Best Choice: A Mac Mini (M2 or newer). It is energy-efficient and handles the background processes perfectly.
-
Alternative: A Linux VPS (DigitalOcean, Hetzner, or Hostinger). You need at least 4GB of RAM; anything under 2GB will likely crash during heavy research tasks.
-
Why not your laptop? If you close the lid, your assistant goes to sleep.
2. A "Sandboxed" Environment
-
Dedicated User Account: Never install OpenClaw on your primary computer profile. Create a new "Guest" or "AI" user account. This prevents the bot from accidentally accessing your personal photos, keychain, or browser cookies.
-
New Apple ID/Google Account: If the bot is managing your calendar or emails, give it a fresh account to minimize data leak risks.
3. Messaging "Channel" Setup
You interact with OpenClaw through apps you already use.
-
WhatsApp: Requires an eSIM and the WhatsApp Business app. This allows you to have the bot on a separate number so it doesn't take over your personal chats.
-
Telegram: The easiest setup. You just need to create a bot via @BotFather and grab the API Token.
4. Software & API Prerequisites
Node.js v22 or higher: OpenClaw is built on modern JavaScript.
API Keys: You need an "engine" to power the brain.
-
Anthropic (Claude): Recommended for best reasoning.
-
OpenAI (GPT-4o): Excellent for general tasks.
-
Brave Search API: Essential if you want the bot to research the live web.
Part 3: Moltbot / OpenClaw Download and Install (Step-by-Step)
OpenClaw (formerly Moltbot or Clawdbot) lets you run a powerful AI assistant on your own computer. Follow these steps carefully to install and set it up for Windows, Mac, or Linux.
Step 1: Prerequisites
Before installing OpenClaw, make sure you have:
1.A Telegram account (for chatting with your AI assistant).
-
2.Basic knowledge of terminal commands (Mac/Linux) or PowerShell (Windows).
3.Node.js installed on your system.
-
4.A stable internet connection.
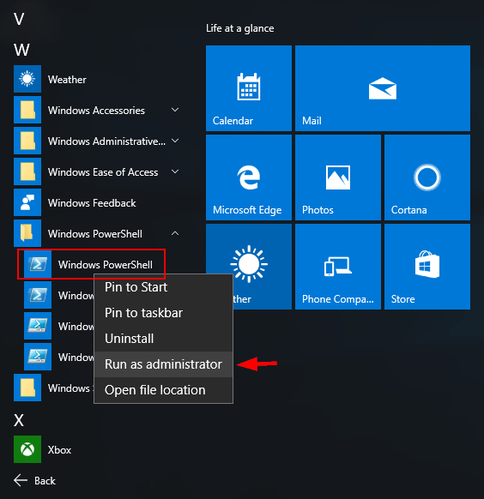
Step 2: Open Your Terminal / PowerShell
-
5.Mac / Linux: Open the Terminal app.
-
6.Windows: Open PowerShell as Administrator by searching it in the Start menu, right-clicking, and selecting Run as Administrator.
-

Step 3: Download and Install OpenClaw
For Mac / Linux, run:
curl -fsSL https://openclaw.ai/install.sh |
For Windows, run:
iwr -useb https://openclaw.ai/install.ps1 | iex

What this does:
-
Automatically downloads the latest version of OpenClaw.
-
Checks your system for required dependencies.
-
Installs Node.js if it's missing.
-
Configures OpenClaw for your operating system.
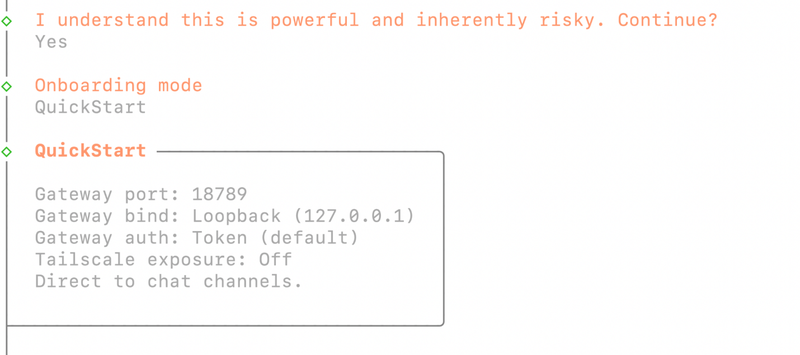
Step 4: Start OpenClaw Setup Wizard
After installation, OpenClaw opens an interactive terminal interface (TUI).
You'll be asked to:
1.Confirm you want to continue and Press Enter.
-
2.Choose an onboarding mode select QuickStart by pressing the spacebar, then Enter.

Step 5: Choose an AI Model
Next, OpenClaw will ask which AI service to connect:
-
Google (Gemini)
-
OpenAI (GPT models)
-
Anthropic (Claude models)
Steps:
1.Select your preferred provider.
2.Log in to your account.
3.Complete the authentication process.
-
4.Choose the model you want to use (e.g., gemini-3-flash or codex-mini-latest).


Step 6: Connect OpenClaw to Telegram
To chat with your assistant on your phone:
1.Open Telegram.
2.Search for @BotFather.
3.Start a chat and type /newbot.
4.Give your bot a name and username.
-
5.Copy the bot token generated by BotFather.
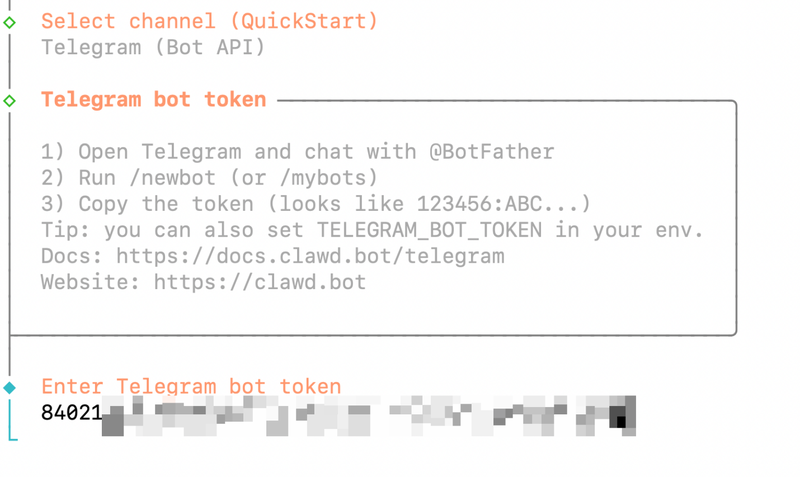
6.Paste the token into the OpenClaw TUI when prompted.

Step 7: Set Up Skills (Optional)
OpenClaw can use skills to perform specific tasks like sending emails or creating files.
1.When prompted, select Yes to configure skills.
2.Choose npm as your Node.js manager.
-
3.For now, select Skip for now if you don't want to add skills.
Skills can be added later anytime.
Step 8: Skip Optional API Keys and Hooks
The wizard may ask for additional API keys or hooks.
-
If you don't have them, select No.
-
These are optional and only needed for advanced features.
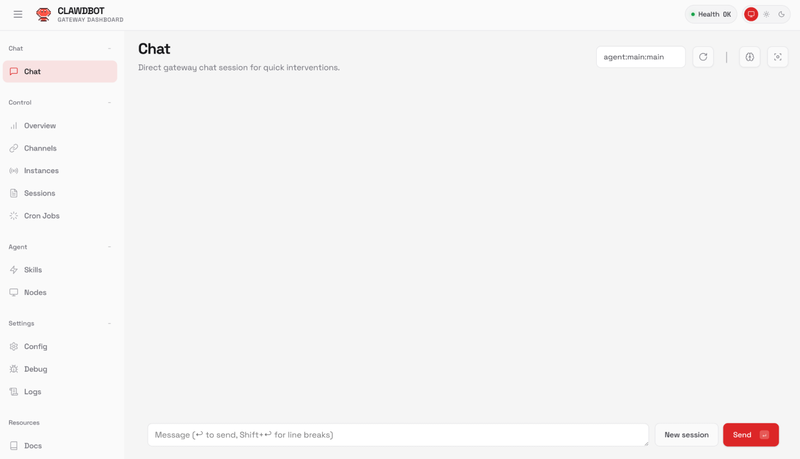
Step 9: Choose Your Interface
OpenClaw gives two ways to interact:
-
1.Control UI (Browser-based): Opens in your web browser.
-
2.TUI (Terminal UI): Runs in the terminal.

Recommended: Use TUI for first-time setup because it shows real-time feedback.
Select Hatch in TUI, press Enter, and answer a few questions like your assistant's name and your nickname.
This personalizes your assistant's identity.
Step 10: Start Chatting
1.Go to your Telegram bot and type /start.
2.OpenClaw will confirm the connection.
-
3.Ask your bot a question to test it.
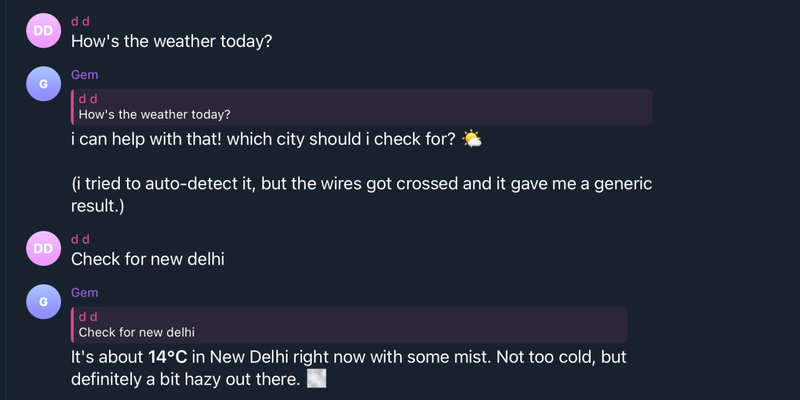

Your OpenClaw assistant is now fully operational and can:
-
Chat via Telegram
-
Perform web searches
-
Create files on your system
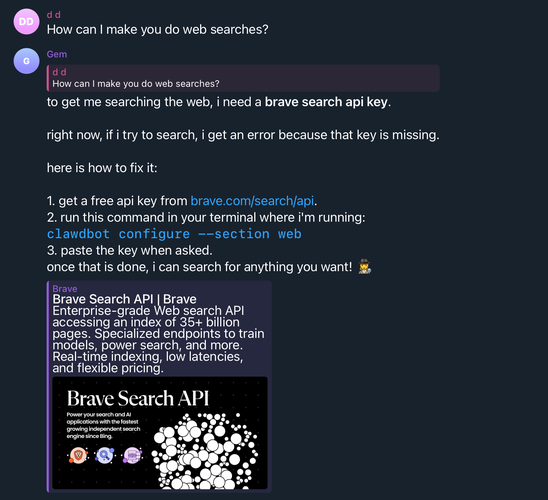
Step 11: Enable Web Search (Optional)
1.Ask your bot via Telegram how to enable web search.
-
2.Copy the API key from the Brave Web Search API console.
-
3.Paste it in Telegram to connect the bot.

Step 12: Test File Creation
Ask OpenClaw to research a topic and save it in a file (e.g., markdown or text).
-
It will automatically gather the info.
-
Save it with sources included.
Part 4: Common OpenClaw Installation Issues and Fixes
Installing OpenClaw on Windows can fail even when Node.js is installed correctly. Most problems are caused by missing Git, incorrect PATH settings, or PowerShell version issues.
Here are the most common errors and their fixes.
Issue 1: Wrong Node Path Error
Error example
"C:\Program Files\nodejs/node.exe" not found
Why this happens
The installer sometimes looks for Node in the wrong format (node.exe vs nodejs/node.exe), or your PATH variable isn't updated correctly.
Fix
-
1.Open PowerShell
2.Check Node is accessible:
node -v
3. If this fails, reinstall Node.js from the official site
During install, check "Add to PATH"

4. Restart your PC after installation
Issue 2: npm ERR! spawn git ENOENT
Meaning
OpenClaw requires Git, even if Node is working. This error means Git is not installed or not available in PATH.
Fix (Recommended Method)
1. Open PowerShell as Administrator
2. Install Git using Winget:
winget install --id Git.Git -e --source winget
3. Close PowerShell completely
4. Reopen PowerShell as Administrator
5. Confirm Git works:
git --version
6. Run the OpenClaw installer again:
iwr -useb https://openclaw.ai/install.ps1 | iex
Issue 3: Installer Still Fails After Installing Git
If Git and Node both work but installation still fails:
Step 1 --- Use PowerShell 7 (Important)
Older Windows PowerShell versions can cause script execution issues.
Download PowerShell 7 from Microsoft
Install it
Open PowerShell 7 (not Windows PowerShell)
Run the installer again:
iwr -useb https://openclaw.ai/install.ps1 | iex
Bonus Tip: Turn Pictures Into Perfect Words with PixPretty AI Image Describer
PixPretty AI Image Describer is a free online AI tool that transforms images into clear, natural, and meaningful text in seconds. Just upload a photo, paste an image, or drag and drop and watch PixPretty instantly explain what's happening in the scene.
You can choose how you want the description written: detailed, short, people-focused, marketing style, object recognition, or even AI prompts for tools like ChatGPT and Midjourney. No complicated setup. No design skills needed. Just upload and get accurate image descriptions that match your goal.
Conclusion
The moltbot/openclaw download and install process may look difficult, but most errors happen because Git, Node.js, or system settings are not ready. Once everything is set up correctly, the installation becomes simple. Follow each step, check your tools, and Moltbot/OpenClaw will run smoothly on your computer.
If you also need to turn visuals into words, PixPretty AI Image Describer is a free tool that converts any image into clear, natural descriptions. It's ideal for generating captions, detailed explanations, or AI-ready prompts with almost no effort.
PixPretty AI Photo Editor
- 100% free AI Image Generator (Nano Banana 2 powered)
- 4K image quality with fast generation speed
- AI effects & filters for personal and e-commerce use

Related Articles:


