


Krita makes image compression effortless while keeping every detail sharp and professional. You can easily reduce file size, speed up sharing, and maintain top quality for your digital artwork. Whether it's for web, print, or storage, this process ensures smooth results every time making it essential to know how to compress an image in Krita.

Table of Contents
Part 1. How to Compress an Image in Krita
1. Why You Should Compress Images in Krita?
Compressing images in Krita helps reduce file size while keeping the artwork's quality intact. It makes sharing faster, saves storage space, and ensures your files load smoothly on any platform. Whether you're preparing digital art, social media posts, or web visuals, image compression keeps your projects light and professional.
Reasons to compress images in Krita:
- Smaller file size for easier uploads and sharing
- Faster project loading and exporting
- Saves storage space on your computer
- Keeps visual quality sharp and detailed
- Makes files suitable for web and print use
2. Can Krita Compress Images?
Yes, Krita can compress images easily. You can use the Export or Save As options and lower the image quality or change the format. If your Krita file size is too big, this helps reduce it without losing much quality.
You can also export as PDF and later compress PDF files with online tools or software.
Part 2. How to Compress an Image in Krita Easily
1. Resize the Image
Resizing is one of the simplest ways to make your Krita files smaller and easier to manage. By adjusting the image's width, height, or resolution, you can quickly reduce the file size without losing much quality. This is especially useful when your Krita file size is too big or when preparing artwork for sharing or printing.
Here's how to resize an image in Krita:
- 1. Open your image in Krita.
- 2. Go to the top menu and click Image > Scale Image to New Size.
- 3. In the dialog box, enter your preferred width and height.

- 4. To keep proportions the same, make sure the chain icon beside the dimensions is linked.
- 5. Adjust the resolution (PPI) if needed for web use, 72 PPI is enough; for print, use 300 PPI.

- 6. Click OK to apply the changes.

- 7. Save your resized image using File > Export to finalize compression.
2. Compress the .kra File
Krita lets you compress your .kra files to make them smaller and easier to store or share. This is especially helpful when working with large projects that take up a lot of space. The built-in compression options reduce the overall file size without affecting your artwork's quality ideal for archiving or backup purposes.
However, keep in mind that extra compression can make Krita slower when saving or loading files.
Here's how to compress a .kra file in Krita:
1. Save your project as a .kra file.

2. Open the command line (or terminal) on your computer.
3. Use the following command to activate compression options:
- --compress-more: Compress .kra files further for smaller sizes.
- --compress-zip64: Use advanced ZIP64 compression for better efficiency.
- --compress-trim: Trim unnecessary data before saving.

4. Run the command with the path to your .kra file to apply compression.
5. Once done, your Krita file will be much lighter and easier to archive.
3. Export in Different Format
Exporting your artwork in a different format is one of the easiest ways to reduce file size in Krita. By saving your file as JPG or PNG, you can compress your image while keeping good quality. This is helpful for sharing, printing, or uploading online. You can also adjust quality settings and color profiles during export to balance size and appearance.
Here's how to shrink an image in krita:
- 1. Open your project in Krita.
- 2. Go to File > Export from the top menu.

- 3. Choose your desired file format JPG, PNG, or TIFF.

- 4. Click Save to export your image.
4. Use Quality Slider in Export Settings
When saving or exporting images in Krita, you can control the file quality through the Quality Slider. This feature helps you reduce file size without losing too much detail. It's especially useful when exporting in JPG format, where higher compression can lower image quality.
- 1. Open your image in Krita.
- 2. Go to File > Export from the top menu.

- 3. Choose the file format (e.g., .jpg or .png).
- 4. In the export dialog, find the Quality Slider compression lossless Krita option.
- 5. Move the slider to the right (higher value) for better quality or left (lower value) for smaller file size.

- 6. Click OK or Save to export your image with the new quality settings.
5. PixPretty -- The Best Image Compressor Online
PixPretty AI is a powerful online image compressor that reduces file size without affecting quality. It supports multiple formats like JPG, PNG, and WEBP, allowing users to compress images quickly and efficiently. With its smart algorithm, you can reduce image sizes to under 1MB or custom sizes such as 50KB or 100KB while maintaining sharpness and color accuracy.
Start Compress for FreeKey Features of PixPretty
- Compress images without losing quality
- Supports JPG, PNG, GIF, BMP, and more
- Offers custom and preset compression levels
- Allows batch image compression
- Provides fast processing with accurate results
- Lets users set desired size and format after compression
How to Shrink Image File Size in Easy Steps
1. Visit PixPretty Image Compressor and click Try Free Online. Upload your photo by dragging and dropping it or selecting it from your device.

2. Check your image size, then choose a compression level Light (Best Clarity), Medium (Balanced Quality), or High (Smallest Size). You can also set a custom size for complete control.
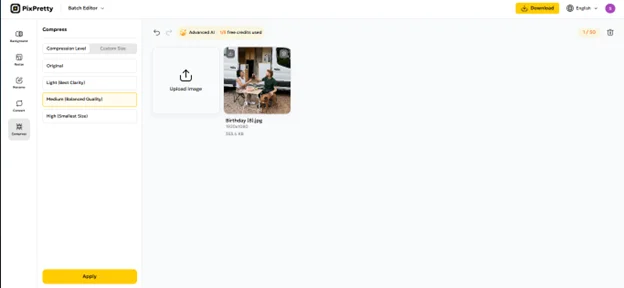
3. Click Apply, check the new file size, and download your smaller, high-quality image instantly even HD downloads are free.

Part 3. FAQs on How to Compress an Image in Krita
Q1. What's the difference between lossy and lossless compression in Krita?
Lossy compression makes the file smaller by removing some image details, which can reduce quality a little. Lossless compression keeps all details and quality the same but makes a bigger file.
Q2. Does Krita have a built-in image compressor?
Krita doesn't have a built-in image compressor. But you can make files smaller by lowering the export quality, resizing the image, or saving in JPG or WEBP format.
Q3. Why does my image look blurry or low quality after exporting?
Your image may look blurry because the export quality was set too low. Try increasing the quality slider when saving, or export as PNG for better results. Also, check your color settings to make sure they match your original image.
Conclusion:
To keep your artwork high-quality and easy to share, it's important to reduce file size smartly. Learning how to compress an image in Krita helps you do that by using export settings, file formats, and compression tools wisely. But if you want a faster and simpler way, PixPretty AI is the best image compressor online it quickly reduces image size without losing clarity or detail.
PixPretty AI Photo Editor
- 100% free AI Image Generator (Nano Banana 2 powered)
- 4K image quality with fast generation speed
- AI effects & filters for personal and e-commerce use


