


One might think of removing the background within Illustrator as a tech job, but it's quite simple. Whether working with a logo or product image or just cleaning up a design, knowing how to remove a background in Illustrator properly saves much time and makes the job look really professional.
Here are four easy ways to get this done, and you do not have to be a master at it. Follow the guidance, and you're definitely going to have a clean design.
Table of Contents
- Part 1: Why Remove the Background Using Illustrator
- Part 2: Remove Background in Illustrator via Image Trace [Quick Method]HOT
- Part 3: Remove Background in Illustrator via Magic Wand
- Part 4: Remove Background in Illustrator via Pen Tool
- Part 5: Remove Background in Illustrator via Shape Builder Tool
- Part 6: FAQs About Removing the Background
Part 1: Why Remove the Background Using Illustrator
Removing the background in Illustrator can really clean up your design and make it more versatile. Here’s why it’s worth doing:
- Your design stays sharp at any size: Since Illustrator works with vector graphics, your artwork won’t lose quality when you resize it. That’s especially useful for things like logos and icons.
- You get a transparent background: No more annoying white boxes around your image. With a transparent background, your design fits perfectly on websites, social posts, posters, or products.
- It just looks more professional: Clean edges and neat cutouts give your work a polished finish, which is super important for client projects or anything public-facing.
- Works better with other tools: Once the background’s gone, you can easily drop your design into Photoshop, InDesign, or After Effects with no extra cleanup needed.
- Gives you more control: With the background out of the way, it’s easier to focus on editing the parts that matter. You can fine-tune details without any distractions.
Part 2: Remove Background in Illustrator via Image Trace [Quick Method]
When you're working with a PNG or JPEG and want a background remover, Illustrator makes it super easy, especially with the Image Trace tool. For cleaning logos, drawings, or fairly flat designs, this can be used very well.
You don't have to switch to any other app like Photoshop anymore. Just do everything within Illustrator. The Image Trace tool changes your image into editable vector shapes, and you can throw away the background in a couple of clicks. No complicated skills required—a simple, clean way to remove background using Illustrator Image Trace.
How to Remove a Background in Adobe Illustrator Using Image Trace
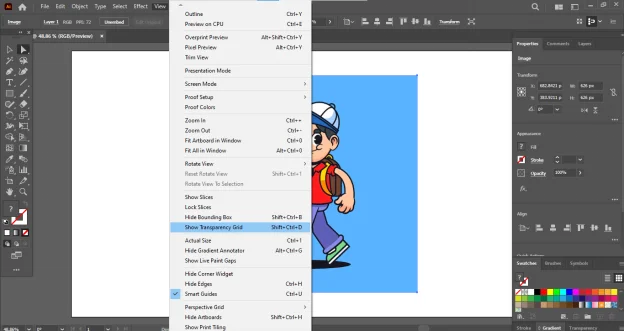
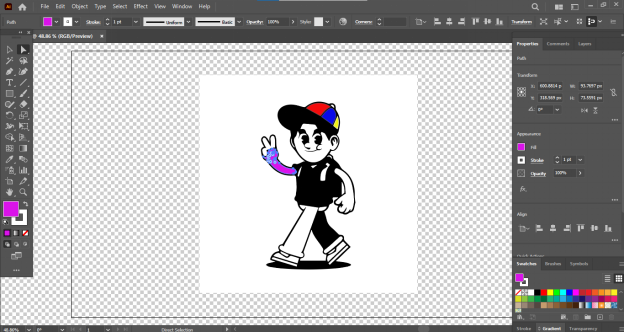
Familiarize Yourself with Transparency Grid: On the App Bar, select View > Show Transparency Grid. This lets you see which parts of your image are empty, which will be useful during background cleanup.
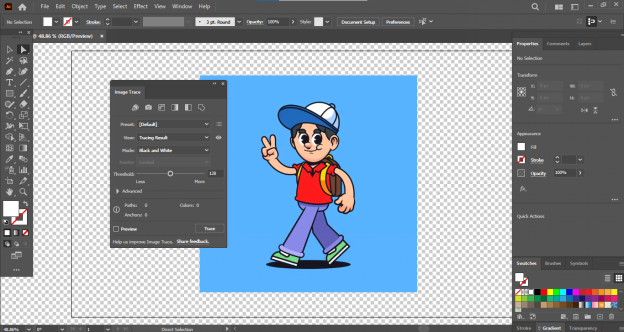
Open Image Trace Panel: Go to Window > Image Trace to enable the Image Trace tool; that is where you convert the image to vector shapes.
- Select Your Image: With the image you want to trace, click once on that image. A blue box will appear around it, showing that it is selected.
Choose Tracing Settings: In the Image Trace panel, choose a preset like High Fidelity Photo for detailed results. You can also adjust other settings like Mode (Color, Grayscale, Black and White). Click the Preview checkbox to see how the trace will look before applying it.
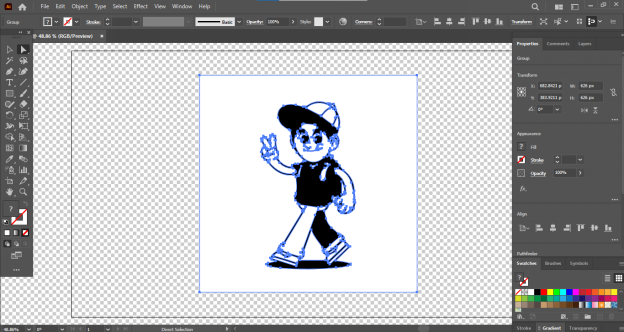
Click Trace: Once you're happy with the preview, click the Trace button to apply the vector conversion.
Expand the Traced Image: Go to Object > Expand, then click OK. This will turn your traced image into editable vector shapes.
Use the Direct Selection Tool: Select the Direct Selection Tool (A) from the left toolbar. With this, you can pick specific shapes within the traced image.
Select and Edit Parts: Click on the areas you want to change (like the background or specific shapes). Since Image Trace usually converts everything to black and white or simplified colors, you can now select parts to recolor or remove.
- Press Delete or Change Colors: Press the Delete key to remove unwanted parts, or use the Fill Color tool to change their color.
Hide the Transparency Grid (Optional): When you're done editing, go to View > Hide Transparency Grid to turn off the grid and view your final result more clearly.


Part 3: Remove Background in Illustrator via Magic Wand
Removing a background in Illustrator is pretty easy with vector images, and the Magic Wand tool will let you do that very well. It allows one to select parts of an image quickly if they are similar in color or appearance. It works like a dream for flat backgrounds, clear illustrations, or logos.
No complicated steps here. Just a few clicks, and you’re done. It’s fast, simple, and perfect when you need quick edits.
How to Remove White Background in Illustrator Using the Magic Wand Tool
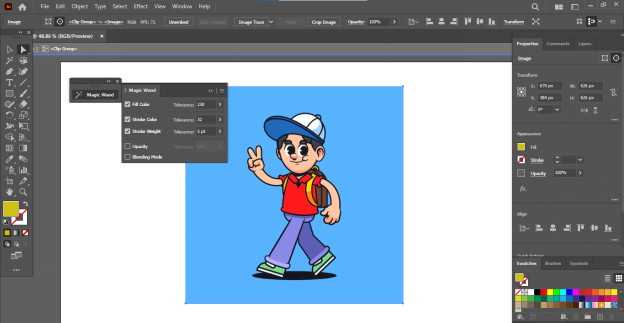
- Open Your Image: Launch Illustrator and open the vector file you want to edit. Select the Magic Wand Tool from the side panel (or press Y), then click on the background area you want to remove. Illustrator will automatically select similar parts.
Tip: To add more areas to your selection, hold Shift and click them. - Make Small Adjustments (Optional): You can adjust things like stroke, color, or opacity in the top toolbar if the selection isn’t quite right.
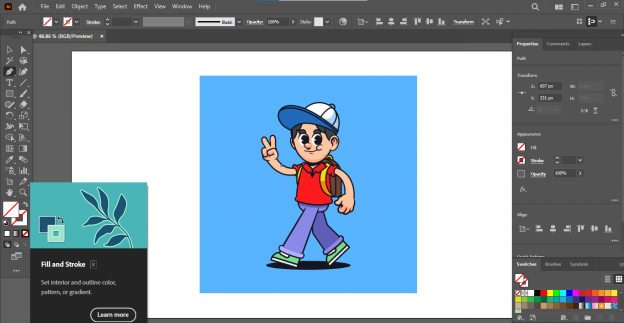
- Delete the Background: Press Delete on your keyboard. If anything’s still left behind, just repeat the process to clean it up fully.
Part 4: Remove Background in Illustrator via Pen Tool
The Pen Tool is your best friend. This method might take a little longer, but it pays off, especially when you're working with detailed logos or designs that have rough or uneven edges. It's going to be a clipping mask, which works kind of like cropping; but instead, you have 100 percent control over the shape. It hides anything outside the area you draw. Let's go through this step by step.
How to Remove Background in Illustrator PNG Using the Pen Tool
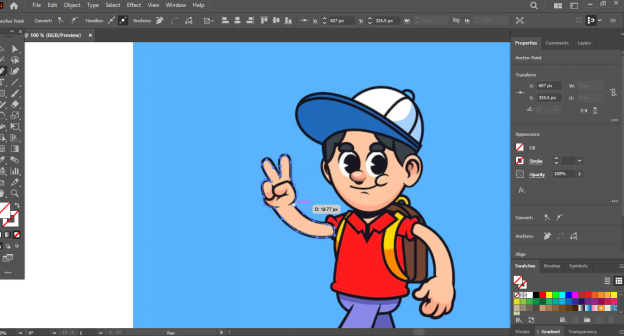
- Open Your Image: Launch Illustrator and add your image to the canvas. Select the Pen Tool from the left toolbar or press P on your keyboard.
- Trace the Area You Want to Keep: Zoom in for better accuracy using the Zoom Tool or by pressing Z. Set the fill to none so the shape doesn’t block your view. Click around the object to create anchor points and form a path. When you reach the starting point, click it again to close the shape.
- Make the Clipping Mask: Hold down Shift and click both your image and the shape you just created. Right-click and choose “Make Clipping Mask.” This will remove everything outside the shape you traced.
- Adjust the Outline (Optional): Use the Pen Tool or Direct Selection Tool (press A) to adjust points if needed. You can move or add anchor points to clean up the edges.
- Check the Transparency: Go to View > Show Transparency Grid. This will show a checkerboard background so you can make sure the background is actually transparent.
- Export and Save Your File: Go to Object > Expand to finalize the design. Then go to File > Export > Export As. Choose PNG or EPS format and make sure to check “Transparent Background.” To save your working file, go to File > Save As.
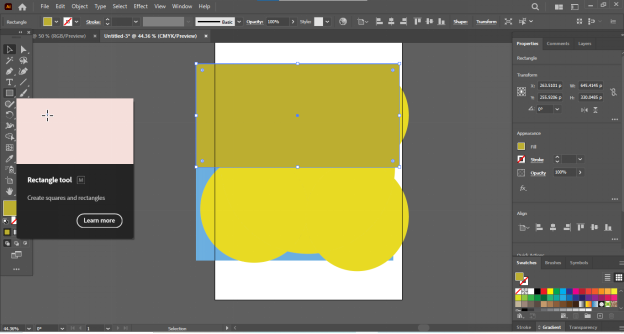
Part 5: Remove Background in Illustrator via Shape Builder Tool
The Shape Builder Tool is a fun and easy way to create and clean up shapes in Illustrator. It’s not just for combining shapes—you can also use it to remove the white background or any unwanted parts from your design.
If you want to learn how to remove a white background in Illustrator without doing anything too complex, this tool is a great choice. It gives you full control and is perfect for beginners who enjoy working with shapes.
How to Remove White Background in Illustrator Using the Shape Builder Tool
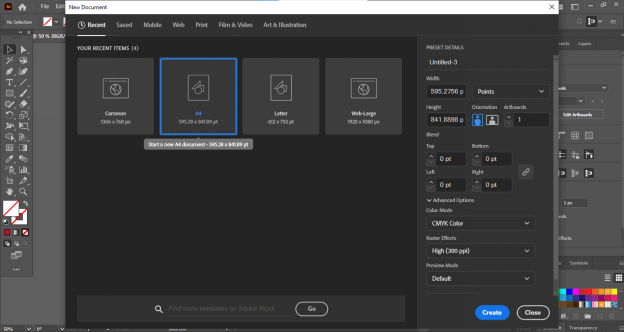
Set up Your Project: Open Illustrator and start a new file. You can go to File > New > Print > A4 to quickly get started with a standard artboard.
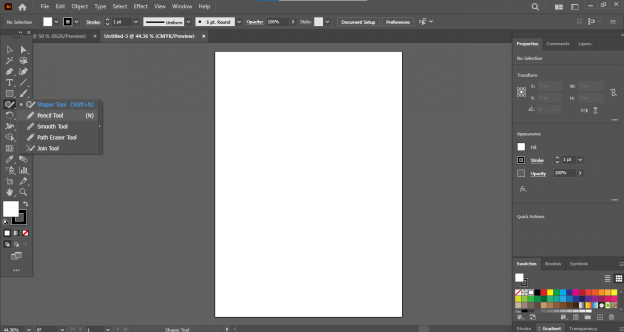
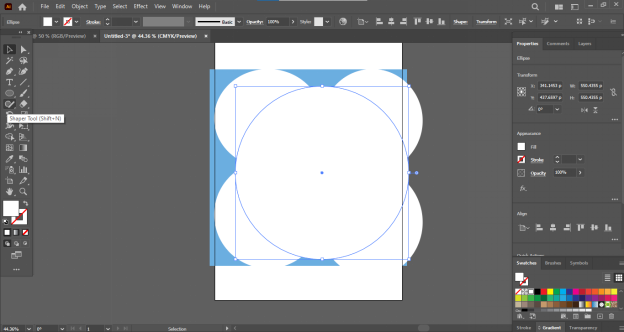
Create Your Shapes: Select the Ellipse Tool (press L), then hold Shift while dragging to draw a perfect circle. To make a copy, hold Alt and Shift as you drag it, or just use Ctrl + C and Ctrl + V. Make four circles this way and arrange them to look like a flower.
- Add a Center Circle: Draw a smaller circle in the middle so that it touches all four larger circles. Give it a thin stroke just so you can see the outline clearly.
Combine Shapes with Shape Builder Tool: Select all five circles. Pick the Shape Builder Tool by pressing Shift + M. Click and drag through the outer areas of the big circles—this will combine them into one single shape.
- Clean up the Design: Remove the stroke from the middle circle to make the design cleaner. Refill the combined shape with your chosen color. Now select everything and rotate the whole flower by 90 degrees to the right.
- Add More Elements (Stem and Leaves): Use the Rectangle Tool to draw a stem. Then use the Ellipse Tool (don’t hold Shift this time) to draw two oval leaves. Place the larger leaf on the right and the smaller one on the left of the stem.
How to Remove Parts Using Shape Builder Tool: To remove the background, draw overlapping shapes. Select them all, use the Shape Builder Tool, hold Alt, drag over the parts to delete, and release.
- Join the Rest and Finish the Design: Still using the Shape Builder Tool (this time without pressing Alt), drag through the areas you want to join. You can then color your final design however you like.


Part 6: FAQs About Removing the Background
- How do I remove the background from an image? Use tools like Image Trace, Magic Wand, Pen Tool, or Shape Builder. Pick what suits your image, then select and delete the background.
- How do I get rid of the white background in Illustrator workspace? Try Image Trace to select the white area, or use a clipping mask to hide it without deleting.
- How do I make a background transparent in Illustrator? Remove the background, then export as a PNG. Make sure to check “Transparent Background” before saving.
- How do I remove the background from an artboard in Illustrator? Go to the View menu and turn on the Transparency Grid. Shortcut: Shift + Ctrl + D (Windows) or Shift + Command + D (Mac).
Final Word
Removing backgrounds in Illustrator gets easier once you know which tools to use. Whether it’s a logo, icon, or any graphic, a clean background makes your design look better and more professional. Try different methods of how to remove a background in Illustrator and see what works best for your project. With a bit of practice, you’ll get smooth results every time.
PixPretty AI Photo Editor
- 100% free AI Image Generator (Nano Banana 2 powered)
- 4K image quality with fast generation speed
- AI effects & filters for personal and e-commerce use


