Resizing images in GIMP is a simple yet powerful way to make your photos fit any need while keeping their original quality intact. With GIMP’s built-in tools, you can easily adjust image dimensions, scale layers, or modify selections with precision.
In this guide, you’ll discover how to resize an image in GIMP step by step ensuring your visuals stay sharp, clean, and perfectly proportioned for any project.
Table of Contents
- Part 1: Resize an Image in GIMP Numerically (Precise Control)
- Part 2: Resize an Image in GIMP Using the Scale Tool (Manual Dragging)
- Part 3: Advanced Scaling – Layers, Canvas, Selections & Rotation
- Part 4: GIMP Alternative AI – Resize Images Effortlessly with PixPretty
- FAQs About How to Resize an Image in GIMP
Part 1: Resize an Image in GIMP Numerically (Precise Control)
The best way to resize an image numerically is to do it in GIMP. This technique lets you control every pixel and maintain the perfect aspect ratio ideal for printing, web uploads, or design work. Though it looks a bit technical at first, it’s actually quite simple once you know where to find the options.
Steps of how to resize image in GIMP without losing quality
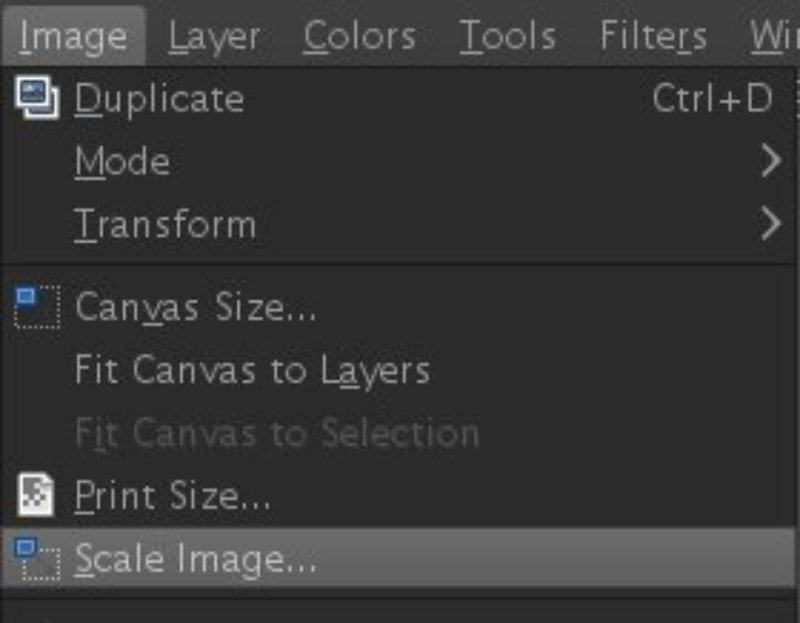
Step 1: Open the Scale Image Menu
Go to the top menu and select Image › Scale Image. This opens a box where you’ll enter your desired dimensions.
Step 2: Set Your New Dimensions
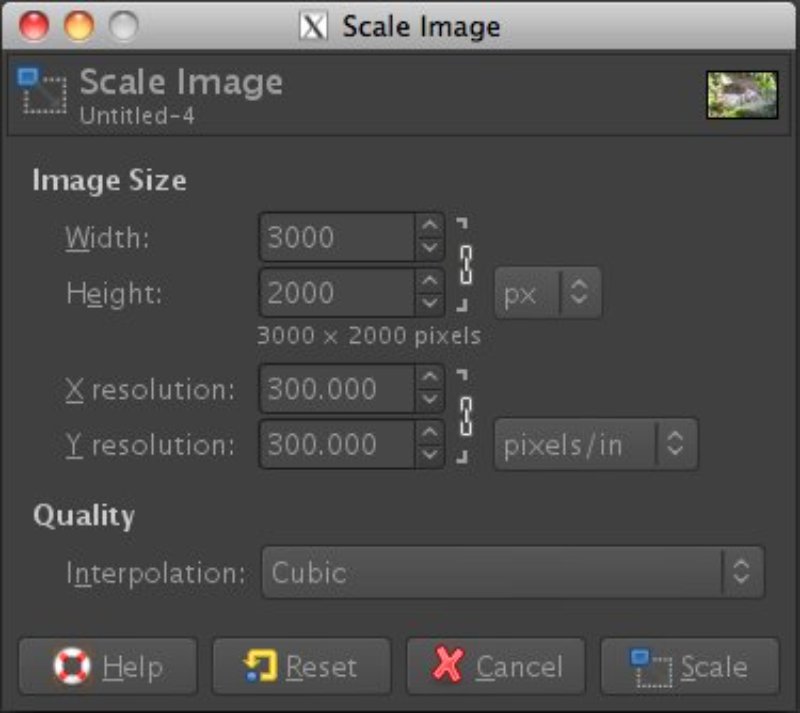
- Enter the new Width and Height.
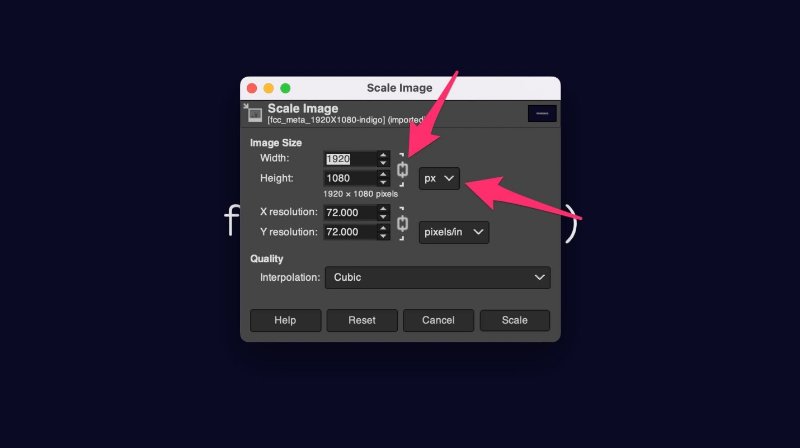
- To prevent distortion, click the chain icon to lock the aspect ratio.
- You can also choose your preferred unit pixels, inches, or percentage.
Step 3: Choose the Right Quality Setting
Under Quality › Interpolation, select Cubic or NoHalo.These options help preserve image sharpness and clarity when resizing.
Step 4: Apply the Changes
Click Scale. GIMP will resize your image precisely to your chosen dimensions.
Step 5: Save or Export the File
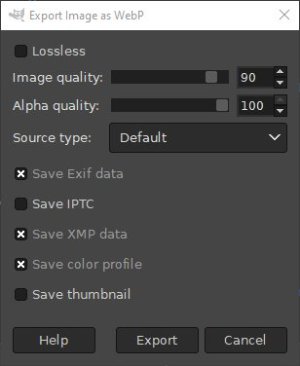
- Use File › Save As to save in GIMP’s native .XCF format.
- Or choose File › Export As to save in .PNG or .JPG for sharing.
Part 2: Resize an Image in GIMP Using the Scale Tool (Manual Dragging)
Using the Scale Tool in GIMP, you can simply resize visually if you don't know the exact size. This tool lets you click and drag to scale images directly on the canvas. It’s faster and easier than typing values perfect for beginners. However, it can be a bit tricky if you’re working with multiple layers, as it only resizes the selected layer.
Steps of how to resize an image in GIMP by dragging
Step 1: Activate the Scale Tool
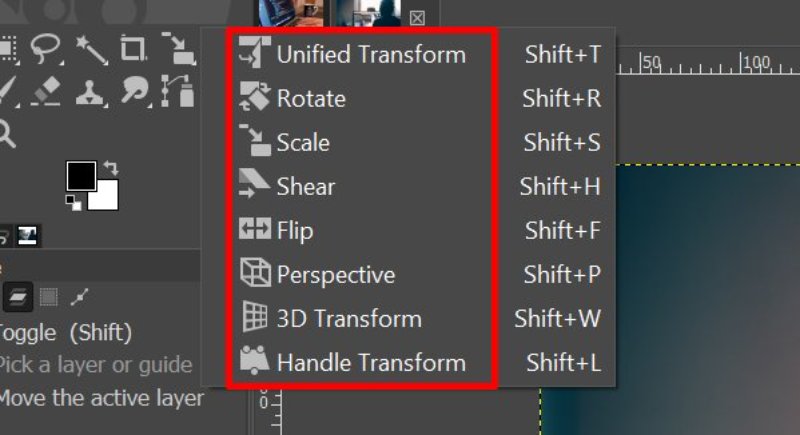
You can find it in Tools › Transform Tools › Scale, or simply press Shift + S. Your cursor will change, showing that the tool is active.
Step 2: Click on the Image
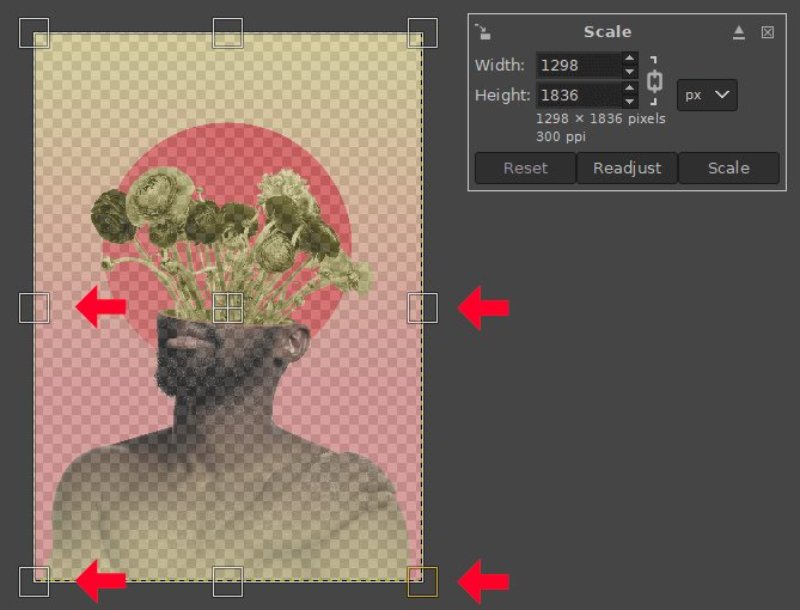
Click once on your image. You’ll see scaling handles (small squares) appear at the corners and sides.
Step 3: Resize by Dragging
Click and drag a handle to scale your image.
- Hold Shift to keep the original proportions.
- Hold Ctrl to resize from the center. You can “eyeball” the size and stop when it looks right.
Step 4: Confirm the New Size
When you’re done, press Enter to apply the scaling.
Step 5: Adjust the Canvas (Optional)
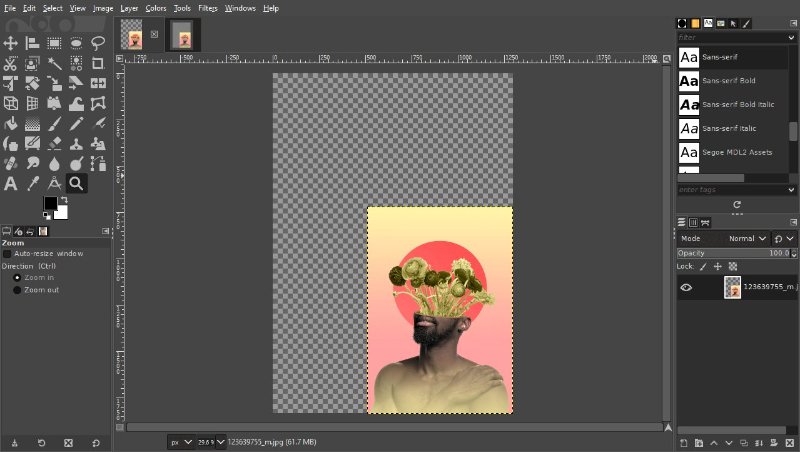
If you notice empty space or a checkerboard background, resize the canvas to match. Go to Image › Crop to Content. This trims the workspace to fit the resized image perfectly.
Part 3: Advanced Scaling – Layers, Canvas, Selections & Rotation
Once you’ve mastered basic resizing, it’s time to explore GIMP’s advanced scaling tools. These allow you to resize specific parts of your project, adjust the canvas to fit your edits, and even rotate images with precision. Whether you’re editing multiple layers or refining your image layout, these options give you full creative control.
Step 1: Open your image in GIMP
Go to File > Open, select your image, or drag it into the GIMP window. Once it opens, you’ll see it displayed in the main editing area.
Step 2: Resize a layer
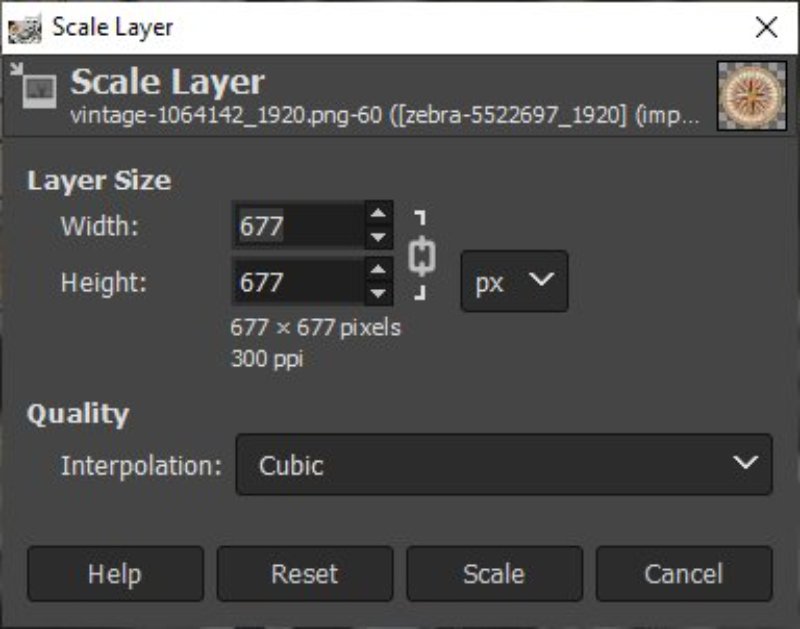
If you want to resize a specific layer, right-click on it in the Layers panel and choose Layer > Scale Layer. Adjust the width and height, then click Scale. You can repeat this for other layers if needed.
Step 3: Resize canvas in GIMP
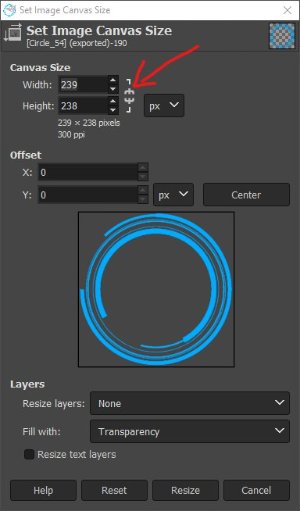
To adjust your entire workspace, go to Image > Canvas Size. Change the width or height and click Resize. This helps you make room for added elements or trim empty space around your photo.
Step 4: Resize image or selection
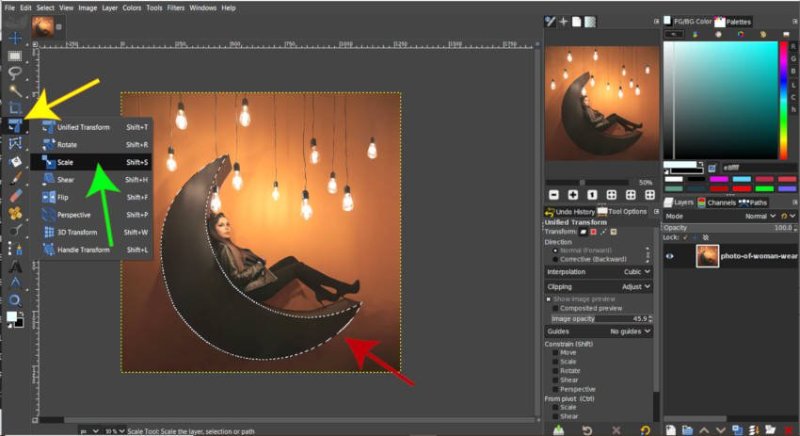
If you only want to resize a specific part of your image, select it using the Rectangle Select Tool or Free Select Tool, then go to Tools > Transform Tools > Scale. This method helps when you only want to adjust one section instead of the whole image.
Step 5: Save your edited image
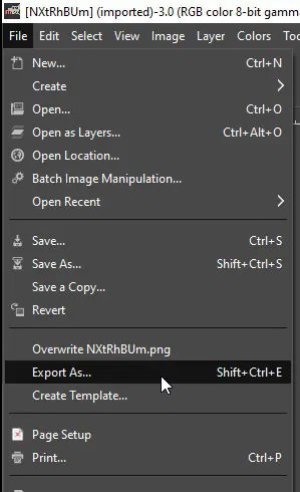
Once you’re satisfied, save your project with File > Export As, and choose your preferred format (e.g., JPEG, PNG).
Selections and Rotation: How to rotate image in GIMP
Step 1: Select the rotate tool
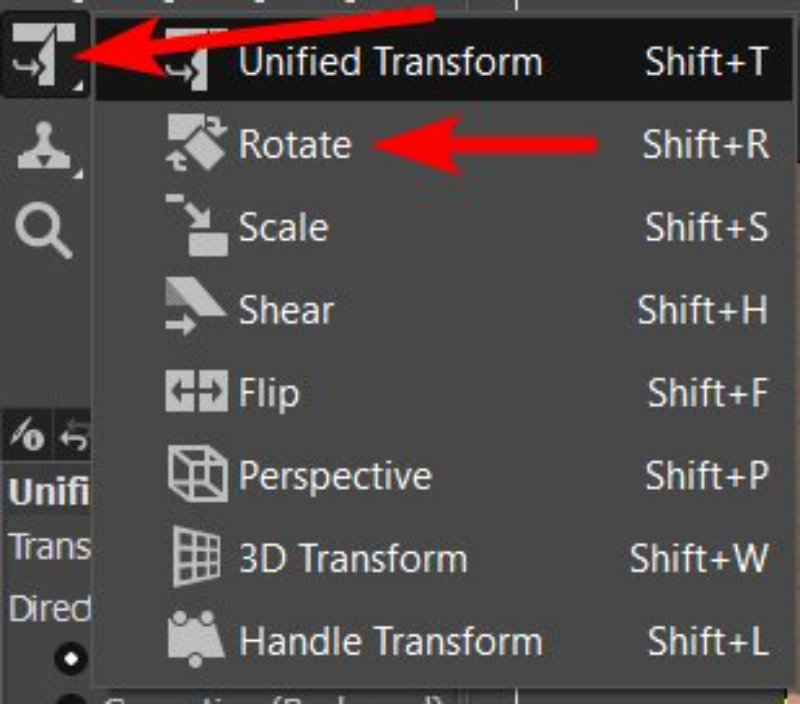
Find the rotate tool under Tools > Transform Tools > Rotate or press Shift + R. This tool allows you to freely rotate your image or layer to any angle.
Step 2: Rotate your image
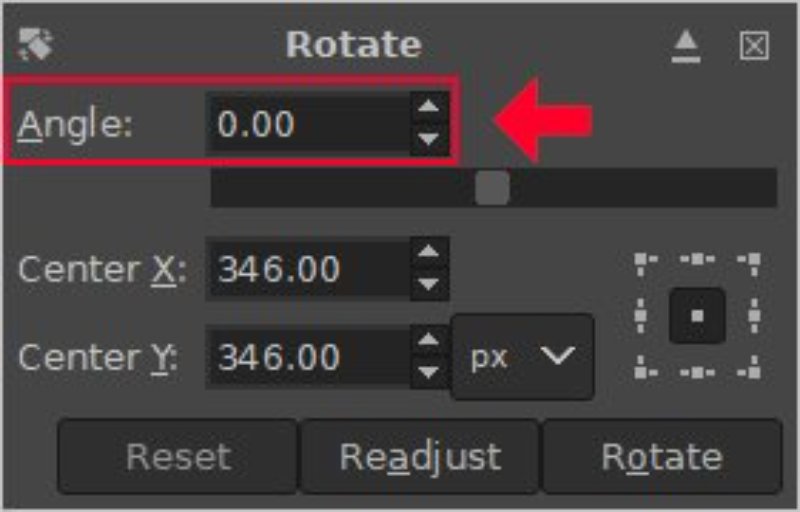
Click and drag the handle to rotate manually, or type a specific angle in the Angle box. Use the Center and Grid options to align perfectly. When done, click Rotate to apply.
Step 3: Check the canvas size
After rotating, you might notice some corners cut off or blank areas. To fix this, go to Image > Canvas Size and adjust the dimensions.
Step 4: Resize the canvas (optional)
If you see extra space around your image, you can crop it using Shift + C (Crop Tool). Draw a box around the part you want to keep and click Crop.
Step 5: Save your final result
When everything looks good, save your rotated and resized image using File > Export As.
Part 4: GIMP Alternative AI – Resize Images Effortlessly with PixPretty
GIMP can be quite time-consuming and complex, so PixPretty AI makes resizing photos simple and free in seconds. It lets you change image dimensions, adjust proportions, and maintain crystal-clear quality all without downloads or technical steps. Whether you're resizing for social media, websites, or personal projects, PixPretty makes it effortless and precise.
How to Resize Photos in Simple Steps
- Step 1: Upload Drag and drop or choose your image to upload.
- Step 2: Resize Enter custom dimensions or pick from preset sizes.
- Step 3: Download Instantly download your HD, resized image for free.


FAQs About How to Resize an Image in GIMP
1. How do you change the size of an image in GIMP?
Go to Image > Scale Image, enter your desired width and height, and click Scale to apply the changes.
2. How do you resize selected objects in GIMP?
To resize a selection with your mouse, click and drag the handles in the direction you want. Use middle handles for one direction and corner handles for two directions.
3. How do I resize all layers in GIMP?
Create a Layer Group, move all layers into it, select the group, and use the Scale Tool (Shift + S). Drag the handles to resize, then press Enter to confirm.
Conclusion
GIMP offers powerful tools to scale, crop, and rotate your images with precision. Still, if you’re looking for an easier way to how to resize an image in gimp style quickly and without losing quality PixPretty AI is the perfect choice. It lets you resize, crop, or enhance images online in seconds with stunning clarity.


