Table of Contents
Part 1: What to Know Before Cropping Images on Mac?
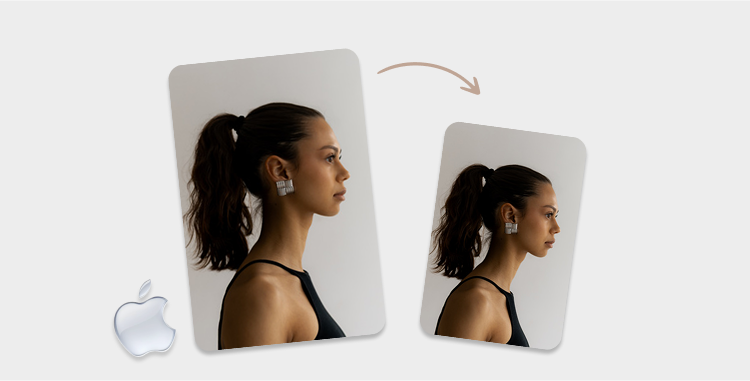
Prior to learning how to crop images on Mac, here are some things you need to know for a professional outcome:
- Choose Your Final Image's Shape: Choose a crop shape that fits how you'll use the image.
- Set the Focal Point: Make sure the main subject stays clear and centered.
- Plan Any Additional Edits First: Adjust brightness, contrast, or color before cropping.
- Consider Background & Context: Keep parts that add context and remove distractions.
- Make a Duplicate Before Cropping: Always edit a duplicate to protect the original file.
Part 2: Top 4 Ways to Crop Images on Mac
Here's how to crop an image on MacBook Air in 4 ways. Each solution has its advantages and limitations. So pick whatever method meets your needs:
1. Crop Images on Mac via Photos App
The Photos app on Mac lets you crop and straighten photos or videos to improve composition or remove unwanted areas. You can use preset or custom aspect ratios or keep the original one. The photo must also be in your Photos library.
If it's downloaded, drag it from Finder into the app, which makes a separate copy. Note that once cropped, you can't replace the original file outside the Photos app. Follow the instructions beneath to crop image on Mac for free with the Photos app:
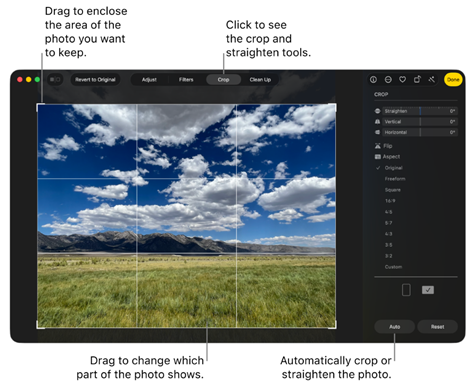
- 1. In the Photos app, double-click the image you want to crop. Then, click "Edit" in the toolbar.

- 2. Tap "Crop" or press C to open crop and straighten options.
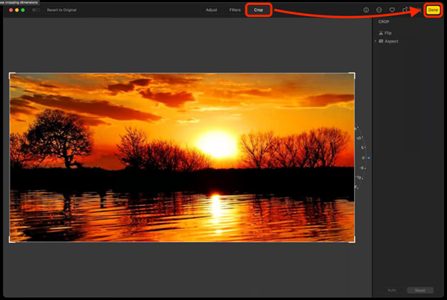
- 3. Choose "Auto" for automatic cropping or straightening. For manual cropping, drag the box to choose what to keep.
- 4. Pick a preset like "Square" or 4:5, or choose "Custom" to set your own. Click "Done" to save.
2. Crop Images on Mac With Photoshop
The Crop Tool in Photoshop lets you trim parts of an image, change its size, or improve composition by focusing on specific areas. It defines new image boundaries and removes everything outside them. By default, Photoshop permanently deletes cropped pixels, but you can keep them by unchecking "Delete Cropped Pixels."
You can also set exact aspect ratios, sizes, or resolutions for precise cropping. Note that cropping normally affects the whole canvas. So, use tools like the Marquee tool and layer masks to crop only one layer. Here's how to crop image on Mac like a screenshot with Photoshop:
- 1. Open your photo in Photoshop. To crop a single layer, use the "Marquee tool" to make a selection and then create a layer mask.
- 2. Then, tap the "Crop Tool" (fifth icon on the toolbar) or press C. Drag corners or edges to set the crop area.
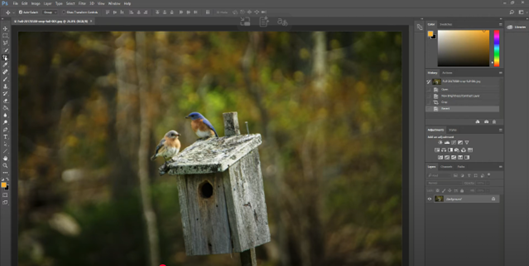
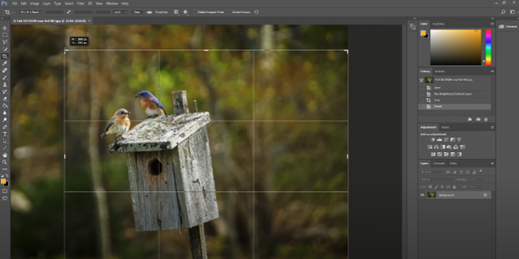
- 3. Press and hold "Shift" to keep the shape. Drag inside to reposition the image.
- 4. Tap "Ratio" and set optional options from the drop-down, like:
- Aspect ratio/size: Choose a preset or enter custom width, height, and resolution.
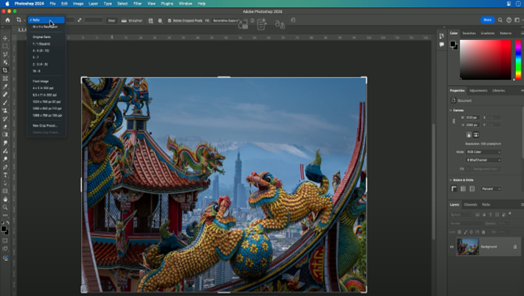
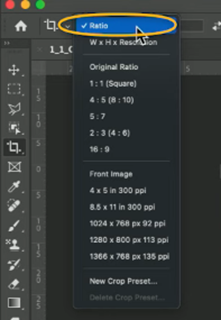
- Resolution: Set a value (e.g., 300 ppi for print).

- Straighten: Use the "Straighten Tool" to fix tilted lines.

- Keep cropped pixels: Untick "Delete Cropped Pixels" to preserve hidden areas.

- 5. Press "Enter" or click the checkmark. Head to "File." Then, choose "Save As." Save with a new name to protect the original.
3. Crop Images on Mac in the Preview App
The Preview app on Mac comes pre-installed and lets you view, edit, and crop JPG image or other pic formats easily. It's great for quick edits like improving composition or removing unwanted parts.
However, it's not ideal for complex edits, doesn't allow cropping multiple photos at once, and only hides parts of a PDF instead of deleting them. Some users also notice lower image quality after cropping, so keeping the original resolution helps. Here's how to crop images on Mac in the Preview app:
- 1. Locate the photo you wish to crop. Then, double-click. Open it with Preview.

- 2. Click the "Markup tool" (pen icon) in the menu. Then, tap the "Rectangular Selection" tool (dotted box).
- 3. Choose other shapes like "Elliptical" or "Lasso" if needed. Drag to select the area you want to keep. Adjust by moving edges or corners.
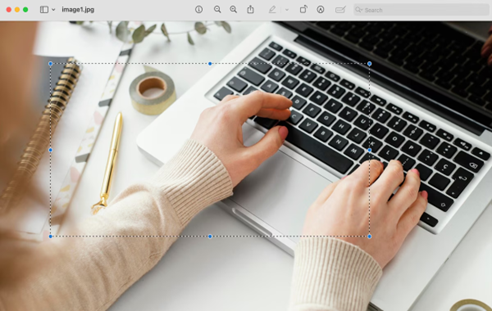
- 4. Head to "Tools." Then, choose "Crop." To replace the original image, choose "File." Then, select "Save."
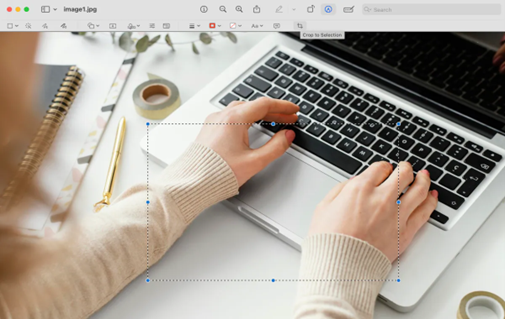
- 5. But to keep the original, choose "File." Next, select "Export" and save as a new copy.
4. Crop Images on Mac With Quick Look
Quick Look on macOS lets you quickly preview many file types without opening another app. In newer versions, it also offers simple editing tools like cropping, rotating, and adding annotations to images and PDFs.
However, it's best for quick edits, not precise work. Some file types may not support cropping, and plugins have limits that can cause previews to fail if exceeded. Here's how to crop image on Mac without losing quality with Quick Look:
- 1. Select the image and press "Spacebar" to preview it in Quick Look. Then, click the "Markup" button to open editing tools.
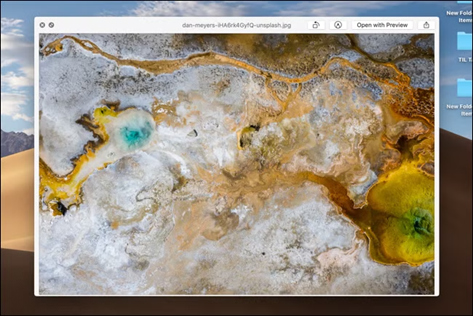

- 2. Click the "Crop" icon in the toolbar. Drag the corners or edges to select the part you want to keep.

- 3. Click "Done" to apply and save the cropped image.

Bonus Tip: Best AI Tool for Cropping Images
If you want a quicker option, a tool like PixPretty AI is a free tool that can crop image online and resize multiple pics. It uses AI to extend, edit, or remove image backgrounds, change backdrop colors, compress, convert formats, and remove watermarks.
Trained on millions of images, this image Resizer for Mac can also resize pics and support complex backgrounds for objects, people, or products. The tool also offers AI portrait retouching, shadow effects, and format conversion (like WebP to PNG or JPG to PNG).
Start Cropping for FreePart 3: FAQs on How to Crop Images on Mac
Q1. How to crop on Mac shortcut?
The crop shortcut on a Mac varies by app. In Preview, press Command + K after selecting the area. But in the Photos app, press Command + C to open the crop tool.
Q2. Does cropping reduce image quality on Mac?
Cropping doesn't reduce quality by itself, but it removes pixels. Enlarging or printing the cropped image can lower the resolution and sharpness. To keep quality, export the cropped version and save the original.
Conclusion
Cropping images on a Mac is easy with tools like Photos, Photoshop, Preview, or Quick Look. Each offers different levels of editing, from quick fixes to advanced control. But if you want to know how to crop images on Mac quickly and with more customization, try PixPretty AI. It's an AI-powered tool that quickly crops, resizes, and edits images while keeping high quality. The tool can also remove backgrounds, change formats, and edit multiple photos at once.


